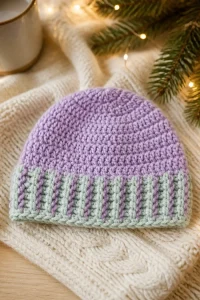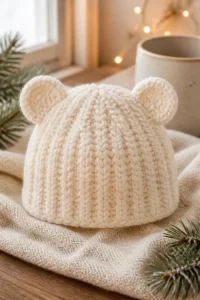
Cozy Braided Earflap Crochet Baby Hat
Affiliate disclosure: This post may contain affiliate links. I may earn a small commission at no extra cost to you. See our Privacy Policy for details HERE.
- What Is a Baby Hat?
- Why This Is a Great Choice for Baby Hats
- Before You Start
- Yarn and Hook Recommendations
- Materials
- Cozy Braided Earflap Crochet Baby Hat Instructions
- Tips for Baby Hat Success
- Common Mistakes to Avoid
- Ways to Make It Your Own
- Care and Washing Instructions
- Frequently Asked Questions
- More Ideas to Try
- Conclusion
The Cozy Braided Earflap Crochet Baby Hat is a crochet baby hat project for makers who enjoy creating useful handmade items. It offers a satisfying way to spend time with yarn and make something personal.
This project may appeal to crocheters who like thoughtful gifts and practical makes. The finished hat can be given to a family welcoming a baby or kept ready for a little one in your own circle.
Making a handmade item encourages patience and care at each stage. It also offers a chance to practice steady work, enjoy the process, and build confidence in creating a gift with personal meaning.
What Is a Baby Hat?
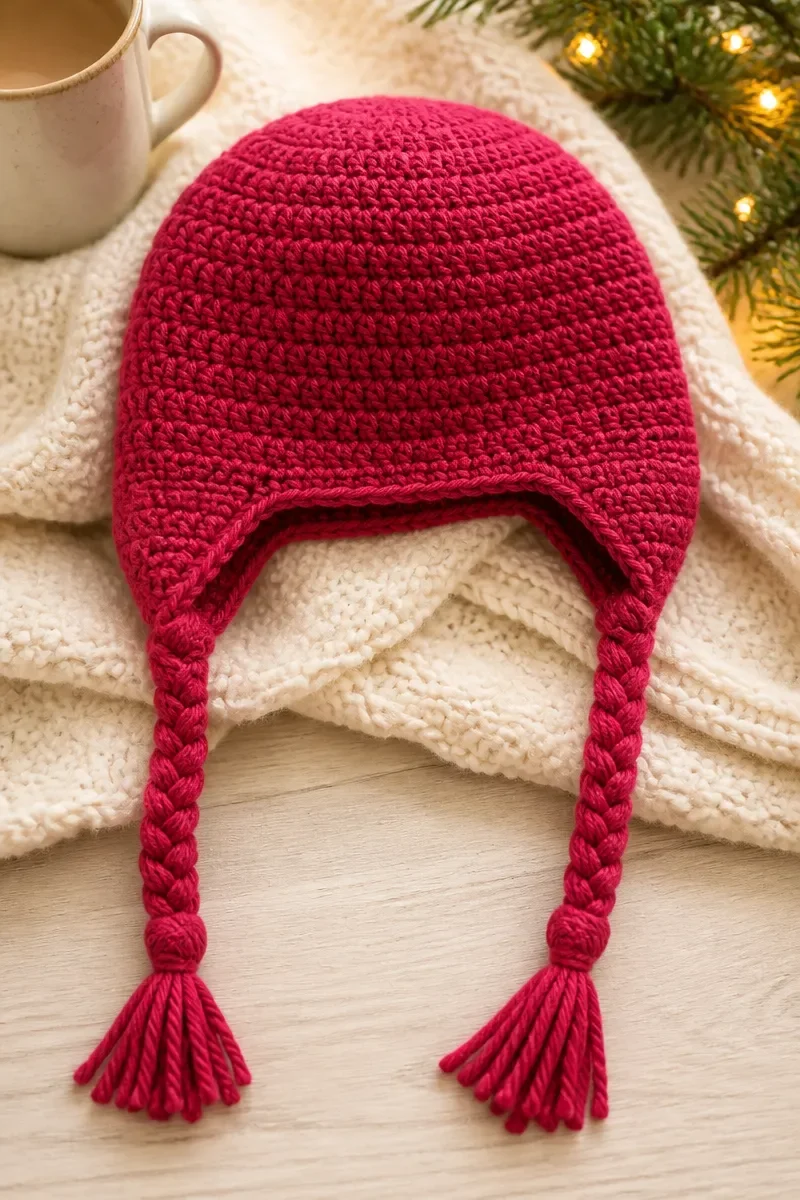
A baby hat is a small crocheted garment made to cover a baby’s head. It is generally designed to feel comfortable and fit gently, while leaving room for movement and everyday care.
This kind of project is often valued for its usefulness and approachable scale. A handmade hat can be a personal gift, a practical addition to a baby’s wardrobe, or a keepsake connected to the person who made it.
Crocheters enjoy baby hats because they can be customized in many ways while remaining useful. The choice of yarn and overall look can suit different tastes, and making one offers a focused project that can fit into a busy crafting routine.
Why This Is a Great Choice for Baby Hats
- Useful handmade gift: A baby hat is a practical present for families preparing for a new arrival. Its everyday purpose makes it a thoughtful choice when you want your crochet to be both personal and useful.
- Personal expression: Handmade pieces carry the care of the maker. Choosing materials and an overall look that suit the recipient lets you make a gift feel considered without needing elaborate embellishment.
- Manageable project: The compact nature of a baby hat makes it appealing when you want a contained crochet project. It can be a welcome option for using a quiet crafting session with a clear purpose.
- Confidence builder: Completing a wearable item gives you experience with the process of making something for another person. It can also help you feel more comfortable taking on future crochet projects.
- Keepsake potential: A handmade gift can become a reminder of a special time or relationship. A recipient may treasure the thought behind it, even after it is no longer part of regular wear.
Before You Start
- Make a gauge swatch and compare it with the target gauge before beginning. This helps you understand how your natural tension affects the finished fabric and whether your hook choice needs adjustment.
- Read through the whole project before picking up your hook. Familiarity with the order of the work makes it easier to anticipate changes and notice questions while there is still time to prepare.
- Keep a notebook or tally sheet handy for recording progress and observations. A brief note about where you paused can make it easier to return to your work after a break.
- Wind and organize your yarn before you begin, keeping the working strand easy to reach. A tidy setup helps prevent tangles and lets you focus on the crochet rather than sorting yarn as you go.
Yarn and Hook Recommendations
- Fiber affects softness, warmth, care, and drape. Acrylic is often practical and easy to care for, while wool may feel warmer; check the yarn label for care guidance.
- Choose a yarn weight that suits the intended fabric and project. A different weight can change the feel and scale of a finished item, so use a consistent weight for predictable results.
- Smooth yarn makes it easier to see and work into the fabric. Highly textured or fuzzy fibers can hide individual loops, which may make counting and correcting mistakes more challenging.
- Color visibility matters while crocheting. A light or medium solid shade can make individual loops easier to distinguish than a very dark shade or a busy multicolor yarn.
- Select a hook that pairs well with your yarn and produces the fabric you want. The label can offer a starting point, but a swatch gives you a more useful sense of the result.
- Keep your chosen yarn and hook consistent throughout the project. Even small differences in fiber, thickness, or hook size may affect how the fabric feels and how evenly it holds its shape.
Materials
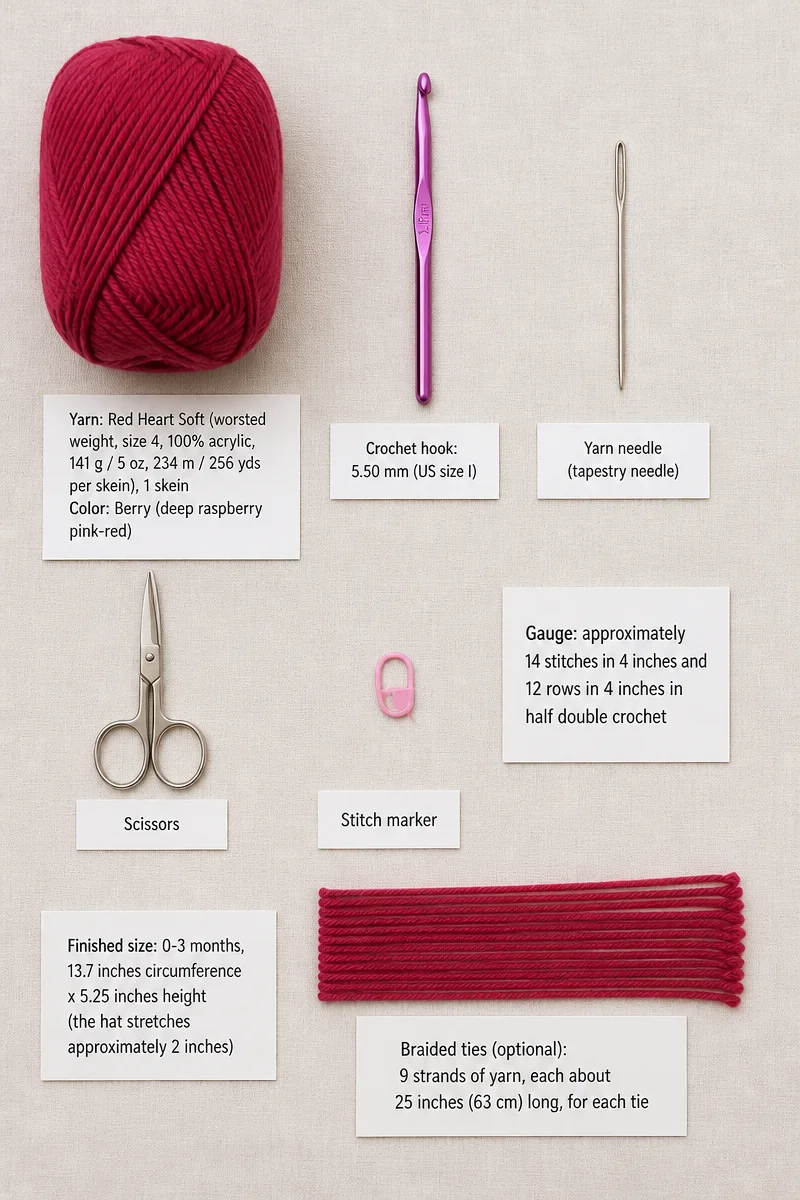
- Yarn: Red Heart Soft (worsted weight, size 4, 100% acrylic, 141 g / 5 oz, 234 m / 256 yds per skein), 1 skein
- Color: Berry (deep raspberry pink-red)
- Crochet hook: 5.50 mm (US size I)
- Yarn needle (tapestry needle)
- Scissors
- Stitch marker
- Gauge: approximately 14 stitches in 4 inches and 12 rows in 4 inches in half double crochet
- Finished size: 0-3 months, 13.7 inches circumference x 5.25 inches height (the hat stretches approximately 2 inches)
- Braided ties (optional): 9 strands of yarn, each about 25 inches (63 cm) long, for each tie
Cozy Braided Earflap Crochet Baby Hat Instructions
Color key: Berry = deep raspberry pink-red.
-
Abbreviations: bl = back loop; ch(s) = chain(s); DMR = double magic ring; hdc = half double crochet; rem = remaining; rep = repeat; RS = right side (the outside of the hat); sc = single crochet; sc2tog = single crochet 2 together; sk = skip; sl st = slip stitch; st(s) = stitch(es).
-
Notes: Use a DMR to begin, or substitute your favorite starting method for projects worked in rounds.
-
Notes: The chain-1 space at the base of each earflap is included in the stitch count for the final earflap row.
-
Notes: The hat is crocheted in continuous rounds. Do not chain 2 or slip stitch to join at the end of each round. Use a stitch marker to keep your place instead.
-
Notes: The hat is worked from the top down in one piece, and the earflaps are added directly to the hat.
-
Notes: Work with the 5.50 mm (US size I) hook, or the size needed for gauge.
-
Notes: In the instructions, * to ** means repeat the instructions between the asterisks the number of times indicated.
Main hat
-
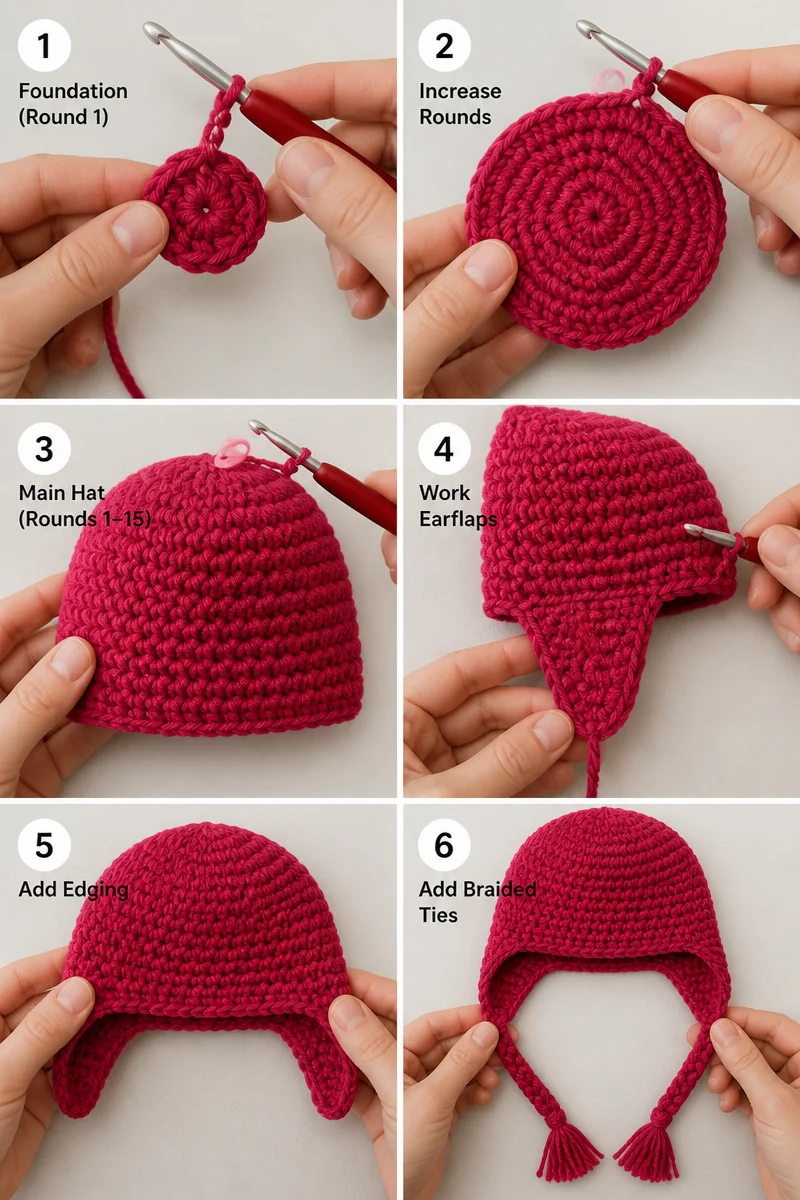
Round 1: In a DMR, ch 1, and make 8 hdc. (8 hdc)
-
Round 2: 2 hdc in each st around. (16 hdc)
-
Round 3: 2 hdc in the next st, 1 hdc in the next st*. Work from * to ** around. (24 hdc)
-
Round 4: 2 hdc in the next st, 1 hdc in each of the next 2 sts*. Work from * to ** around. (32 hdc)
-
Round 5: 2 hdc in the next st, 1 hdc in each of the next 3 sts*. Work from * to ** around. (40 hdc)
-
Round 6: 2 hdc in the next st, 1 hdc in each of the next 4 sts*. Work from * to ** around. (48 hdc)
-
Rounds 7-15: 1 hdc in each st around. (48 hdc)
-
Do not finish off. Continue to the earflaps.
Earflap 1
-
Row 1: 1 sc in each of the next 8 sts, leave the rem sts unworked, ch 1, turn. (8 sc)
-
Row 2: 1 sc in each st across, ch 1, turn. (8 sc)
-
Row 3: Sc2tog, 1 sc in each of the next 4 sts, sc2tog, ch 1, turn. (6 sc)
-
Row 4: 1 sc in each st across, ch 1, turn. (6 sc)
-
Row 5: Sc2tog, 1 sc in each of the next 2 sts, sc2tog, ch 1, turn. (4 sc)
-
Row 6: 1 sc in each st across, ch 1, turn. (4 sc)
-
Row 7: Sc2tog, sc2tog, ch 1, turn. (2 sc)
-
Row 8: 1 sc in the first st, ch 1, 1 sc in the next st. (2 sc, 1 ch-1 space)
-
Finish off. Weave in the ends. Continue to Earflap 2.
Earflap 2
-
Keeping the crown (top) of the hat facing you, count 17 sts from the left edge of the first earflap. Join your yarn in the next st with a sl st. These 17 sts are the front of the hat.
-
Row 1: 1 sc in each of the next 8 sts, leave the rem sts unworked, ch 1, turn. (8 sc)
-
Row 2: 1 sc in each st across, ch 1, turn. (8 sc)
-
Row 3: Sc2tog, 1 sc in each of the next 4 sts, sc2tog, ch 1, turn. (6 sc)
-
Row 4: 1 sc in each st across, ch 1, turn. (6 sc)
-
Row 5: Sc2tog, 1 sc in each of the next 2 sts, sc2tog, ch 1, turn. (4 sc)
-
Row 6: 1 sc in each st across, ch 1, turn. (4 sc)
-
Row 7: Sc2tog, sc2tog, ch 1, turn. (2 sc)
-
Row 8: 1 sc in the first st, ch 1, 1 sc in the next st. (2 sc, 1 ch-1 space)
-
Do not finish off. Continue to the edging.
Edging
-
Round 1: 1 sc in each st around the entire hat and around both earflaps.
-
Round 2: 1 sl st (keep your stitches loose) in each st around the entire hat and both earflaps. If you have trouble making loose sl sts, substitute 1 sc in the bl of each st around instead.
-
Finish off. Weave in the ends.
Braided ties (optional)
-
Cut 9 strands of yarn, each measuring approximately 25 inches (63 cm) in length.
-
Pull the strands through the ch-1 space at the base of an earflap, halfway, until you have the same amount of yarn on each side of the earflap.
-
Divide the strands equally into 3 sections of six strands each, using yarn lengths from each side of the earflap.
-
Braid the strands until you are approximately 4 inches from the end and tie a knot using all the yarn.
-
Repeat for the second tie.
-
Line up the ties and trim the ends to a similar length.
Tips for Baby Hat Success
Comfortable setup
Choose a comfortable seat with enough support for your back and arms. Good lighting helps you see the yarn clearly and reduces the need to lean close to your work.
Arrange your yarn so it moves freely without dragging across the floor or catching on nearby objects. Small adjustments to your seating and workspace can make a long crafting session feel more comfortable.
Steady tension
Let the yarn glide naturally through your fingers rather than pinching it tightly. A relaxed hold helps keep the fabric flexible and makes it easier to work consistently.
If your hands feel tense, pause and set the work down for a moment. Returning with relaxed fingers can help restore a more even rhythm without forcing the yarn through each loop.
Track your place
Use the stitch marker to identify your current position when working in a continuous path. Moving it as you progress can make it easier to recognize where a new circuit begins.
For a project with several stages, keep a tally sheet or notebook nearby. Recording completed sections helps you resume accurately after setting your work aside, especially if you crochet in short sessions.
Check as you go
Pause occasionally to look over the fabric for skipped loops, unexpected gaps, or changes in tension. Spotting a problem early usually makes it easier to locate its source than waiting until much later.
Lay the work flat without stretching it when checking its overall appearance. Compare both sides for a balanced look, and address any obvious inconsistency before continuing.
Common Mistakes to Avoid
Skipping the swatch
A swatch can feel like an extra task, so it is tempting to begin the project immediately. Without one, differences in personal tension may lead to fabric that feels denser or looser than expected.
Make a small sample with the yarn and hook you intend to use, then measure it after it has settled. If the result differs from the target, adjust your hook and make another sample before continuing.
Pulling yarn too tightly
Tight tension can make it difficult to insert the hook and draw loops through. It may also create stiff fabric, uneven edges, and hand fatigue as you try to keep working.
Aim for a comfortable hold that lets the hook move smoothly. If the work feels rigid or your fingers are straining, loosen your grip and let the yarn feed more freely.
Miscounting stitches
It is easy to overlook a loop when the fabric is turned, bunched, or held at an awkward angle. A missed or extra stitch can affect later shaping and make the finished fabric look uneven.
Count in manageable groups and use a marker to identify a reference point. When something seems off, recount the current section before moving on, rather than trying to compensate later.
Leaving ends too short
Very short yarn ends can slip out of woven-in areas, especially when the fabric is handled or washed. Cutting too close can also make it difficult to secure an end neatly.
Leave enough yarn to thread through a yarn needle and weave securely through the fabric. Change direction as you weave so the end is less likely to work loose with use.
Changing yarn or hook midway
Switching materials partway through can create a noticeable difference in thickness, drape, or texture. Even yarn that looks similar on the skein may behave differently when worked.
Set aside enough of your chosen yarn for the whole project before starting. If a replacement is necessary, compare its feel and gauge with a swatch first, since matching labels alone does not guarantee an identical result.
Ways to Make It Your Own
- Choose a different color palette to reflect the recipient’s taste. A calm neutral combination or a cheerful mix can give the handmade gift a distinct personality.
- Try another yarn in the same weight for a different feel. Consider softness and care needs, and make a sample to see how the fabric behaves before choosing.
- Make a coordinating second project to create a thoughtful set. Similar materials or a shared palette can connect the pieces without making them identical.
- Add a handwritten note explaining why you chose to make a handmade gift. A personal message can make the presentation feel especially warm and meaningful.
- Wrap the finished gift in reusable fabric or place it in a keepsake box. A simple presentation gives the recipient something useful or memorable alongside the crochet.
Care and Washing Instructions
Washing: Follow the yarn label for washing guidance, including water temperature and whether gentle machine washing is suitable. Use a mild approach when uncertain, and avoid rough handling that can distort handmade fabric.
Drying: Remove excess water without twisting or wringing the crochet. Lay it flat on a clean, dry surface, arrange it gently into shape, and let it dry fully before putting it away.
Storing: Keep the hat clean and completely dry before storage. Place it in a breathable container or drawer away from direct sunlight, dampness, and items that might snag or crush the fabric.
Frequently Asked Questions
Can I use a different yarn?
Yes, another yarn can work if its weight and fiber suit the kind of fabric you want. Check its care label before choosing it for a gift. Make a swatch to compare the fabric and adjust your hook choice if needed.
How can I keep my stitches even?
Use a relaxed, repeatable way of holding the yarn and hook throughout your work. Avoid pulling the working strand tight after each loop. If the fabric begins to look uneven, pause and check your grip before continuing.
What is a reliable way to count?
Count stitches in small groups, then check the total for the section you are working on. A stitch marker can help you keep a clear reference point. A tally sheet is useful when you need to pause and return later.
What if the finished fabric looks different than expected?
First consider whether your tension, yarn, or hook differs from the setup you planned to use. Compare the fabric with your swatch and look for changes across the work. If the difference is minor, a gentle wash and flat drying may help it settle.
How long should yarn tails be?
Leave enough yarn to thread through a yarn needle and weave securely into the fabric. The amount needed depends on the thickness of the yarn and the area available for weaving. Avoid trimming the tail until it feels secure and unobtrusive.
More Ideas to Try
If you enjoy making practical crochet gifts, consider trying a baby blanket, a small stuffed toy, a soft washcloth, or a simple nursery basket. Each offers a different way to explore yarn and handmade details, while giving you options for presents, home use, or a coordinated collection. Choose a project that suits your interests and the time you have available.
Conclusion
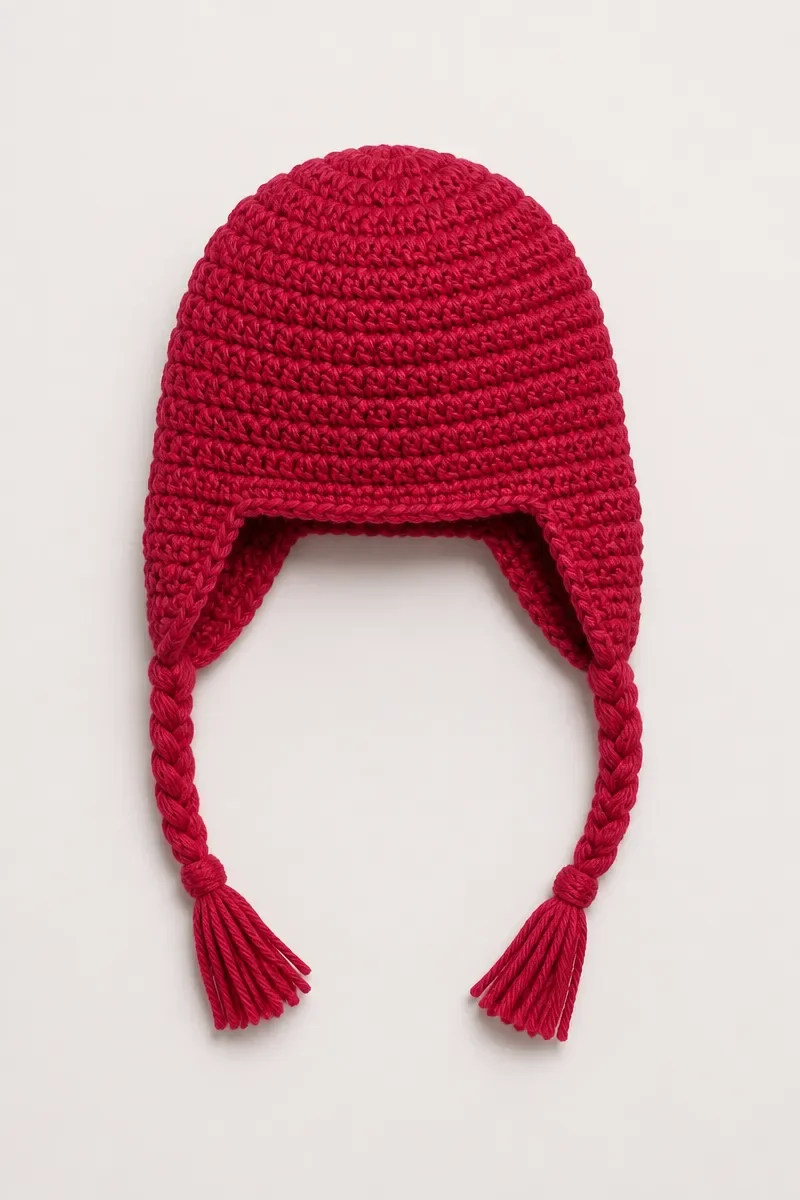
Give the Cozy Braided Earflap Crochet Baby Hat a try if you would enjoy making a personal gift with your own hands. Take pleasure in the calm focus of working with yarn and in creating something meant for someone you care about. When you are ready for another idea, explore more crochet inspiration on the blog.