Quick and Simple Striped Crochet Blanket

Affiliate disclosure: This post may contain affiliate links. I may earn a small commission at no extra cost to you. See our Privacy Policy for details HERE.
- What Is a Crochet Blanket?
- Why This Is a Great Choice for a Crochet Blanket
- Before You Start
- Yarn and Hook Recommendations
- Materials
- Quick and Simple Striped Crochet Blanket Instructions
- Tips for a Crochet Blanket Success
- Common Mistakes to Avoid
- Ways to Make It Your Own
- Care and Washing Instructions
- Frequently Asked Questions
- More Ideas to Try
- Conclusion
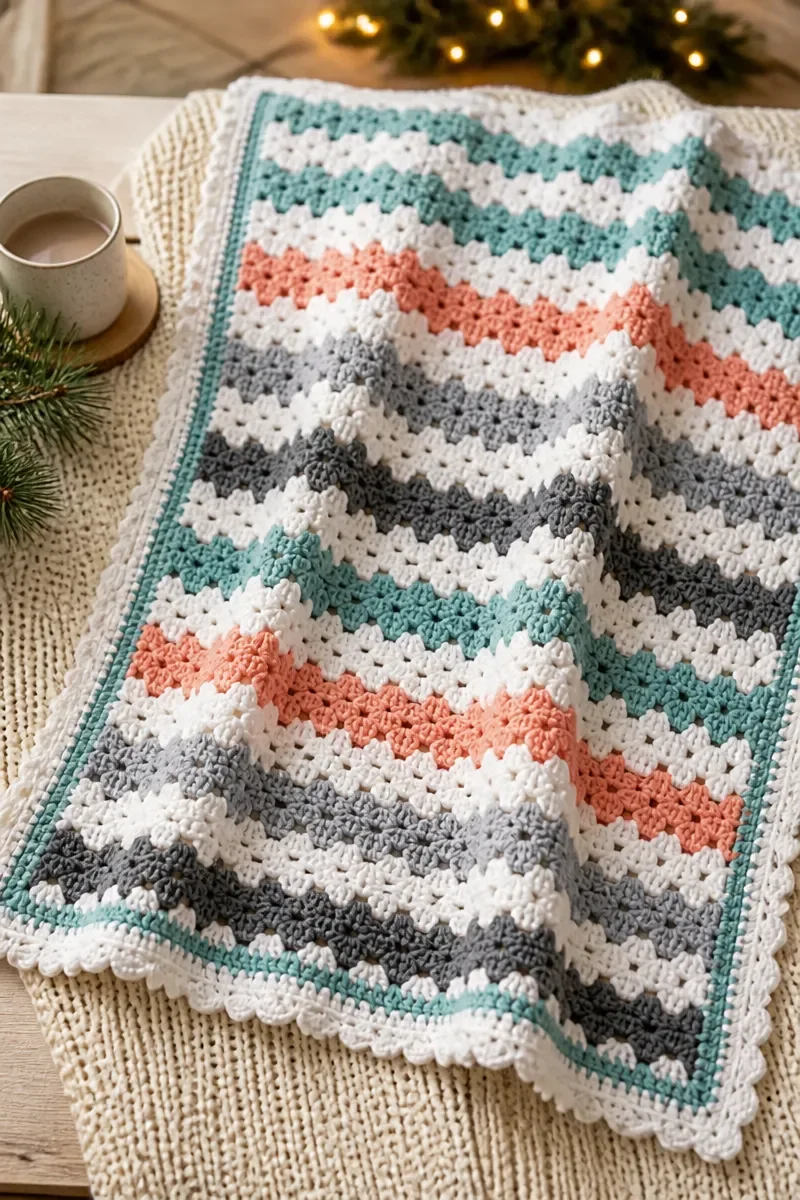
Quick and Simple Striped Crochet Blanket is a welcoming crochet blanket project for anyone who enjoys making useful pieces by hand. It offers a clear path from a simple start to a finished item you can keep close or share with someone special.
This project can suit a newer crocheter looking for steady practice as well as an experienced maker who wants a satisfying handmade gift. The finished blanket can add comfort at home, accompany quiet moments, or be presented to a friend or family member.
Making a blanket encourages patience and care as you work toward a complete, useful result. It also gives you room to build confidence, practice consistency, and enjoy the satisfaction of finishing a gift made with thought.
What Is a Crochet Blanket?
A crochet blanket is a flexible piece of fabric made by working yarn into connected rows or motifs. Blankets can be compact for personal use or larger for sharing, and their texture and drape depend on the yarn, construction, and maker’s habits.
People use crochet blankets for warmth, comfort, and everyday living. A smaller blanket can rest on a chair or travel along for quiet time, while a larger one can be shared at home. The best use depends on the recipient and the setting.
Crocheters appreciate blankets because the format is practical and adaptable. A maker can focus on steady progress, learn how fabric behaves as it grows, and create a handmade item that feels personal without needing a complicated project concept.
Why This Is a Great Choice for a Crochet Blanket
- Useful purpose: A blanket can become part of everyday comfort at home. Its practical value makes the work feel rewarding, and it can suit a range of households and personal preferences.
- Personal meaning: Handmade blankets can carry the care and attention of the person who made them. They are thoughtful choices for celebrations, welcoming a new household, or offering comfort to someone you love.
- Flexible making: Blanket projects give makers room to settle into a familiar rhythm. You can work in manageable sessions and enjoy seeing a useful piece take shape gradually.
- Confidence building: Completing a larger handmade item can strengthen patience and trust in your abilities. Each period of focused making contributes to a result you can use or share.
- Welcoming for makers: The broad appeal of blankets makes them a pleasing choice for varied experience levels. It is satisfying to create something useful while developing steadiness and confidence.
Before You Start
- Make a gauge swatch with the yarn and hook you plan to use. This helps you see how your fabric feels and behaves before you commit to the full project.
- Read through everything before starting so the overall flow feels familiar. Notice where you may want to pause, and make sure the tools and supplies are ready.
- Keep a notebook or tally sheet handy for recording your progress. A brief note about where you stopped can make it easier to return after a break.
- Organize and wind your yarn before you begin. Keeping skeins contained and accessible can reduce tangles and help your workspace stay comfortable.
Yarn and Hook Recommendations
- Fiber affects warmth, weight, and care. Acrylic is often practical for regular use, while wool can feel warm and springy; cotton can feel cooler and more structured.
- Choose a yarn weight that suits the drape and substance you want. A consistent weight also makes it easier to maintain a uniform fabric throughout a blanket.
- Smooth yarn helps you see and feel the working loops clearly. Highly textured or fuzzy yarn can obscure details, so it may be less comfortable when learning an unfamiliar method.
- Consider how visible the yarn’s texture and surface are under your usual lighting. A clearly defined strand can make it easier to locate loops and recognize how your work is forming.
- Pair the hook with the yarn and your natural tension. If the fabric feels stiff, try a larger hook; if it feels loose or open, a smaller hook may help.
- Check the yarn label for care information and suggested hook guidance. Treat suggestions as a starting point, since personal tension and the fabric you prefer also matter.
Materials
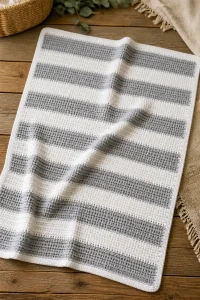
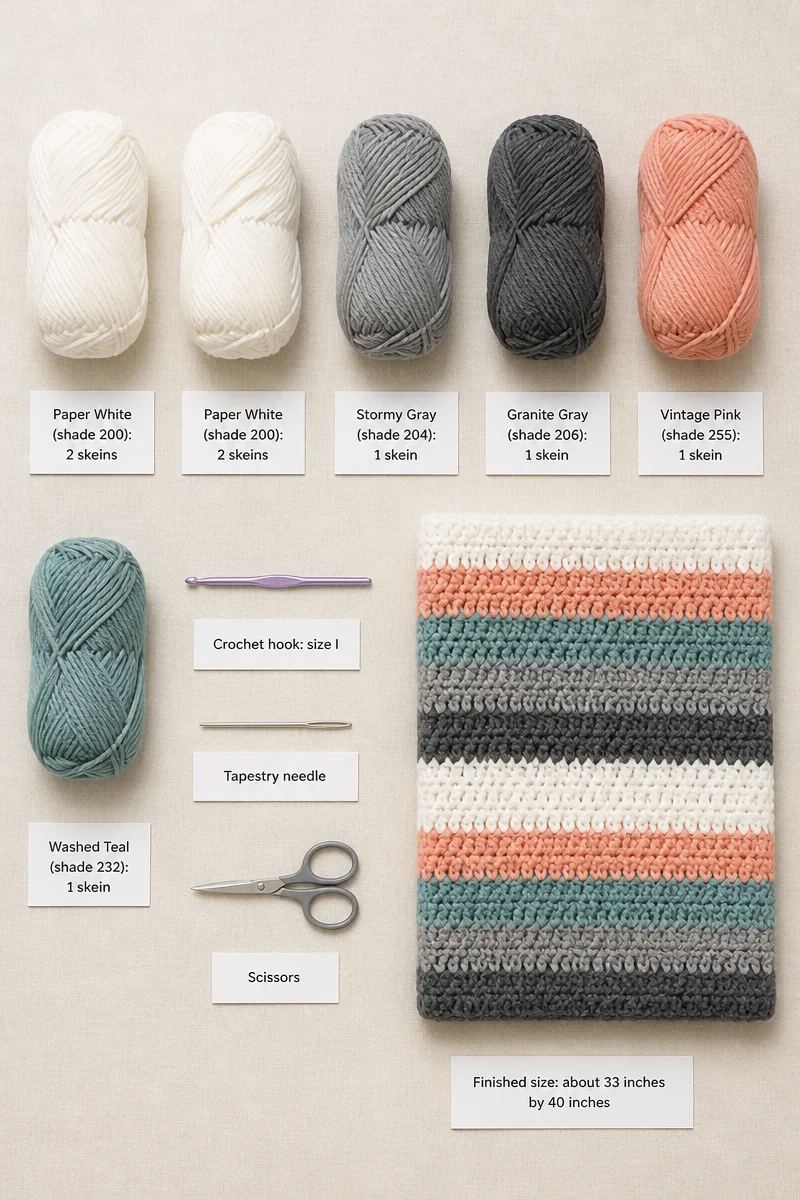
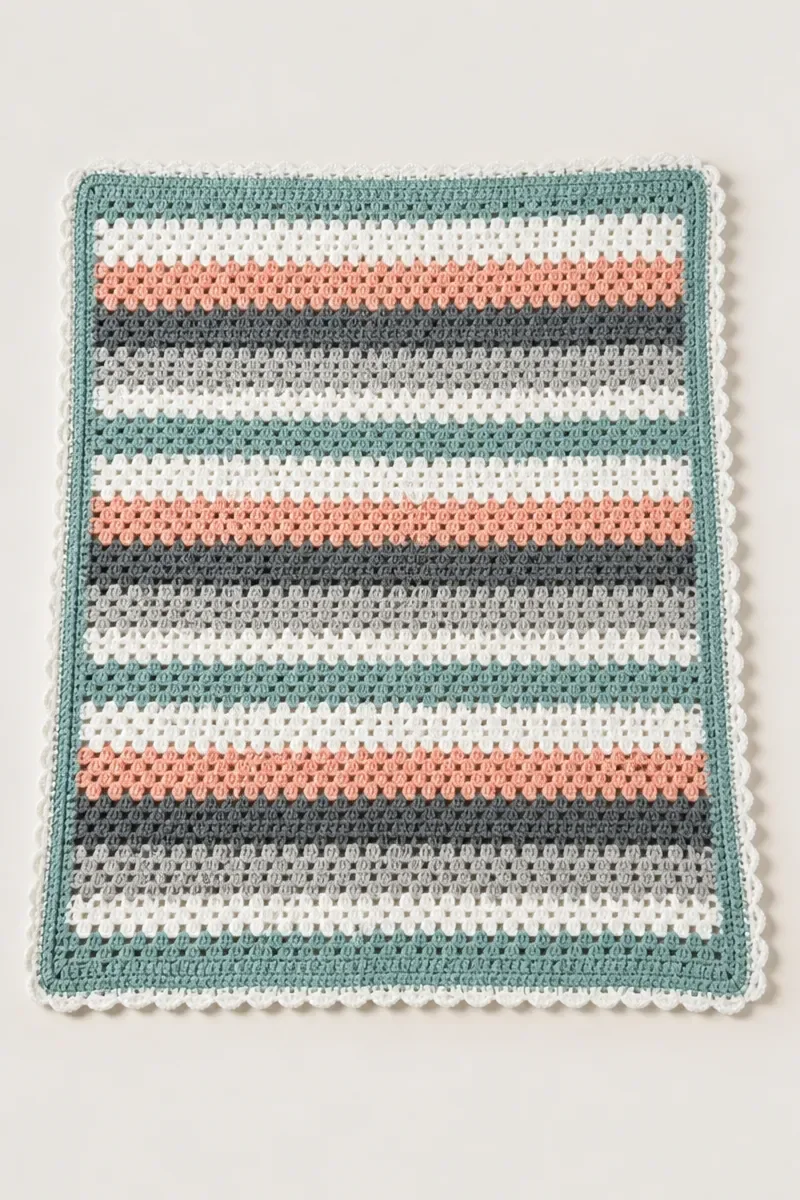
- Yarn: Paintbox Yarns, worsted weight (shown in 5 shades)
- Paper White (shade 200, clean white): 2 skeins
- Stormy Gray (shade 204, mid cool gray): 1 skein
- Granite Gray (shade 206, deeper slate gray): 1 skein
- Vintage Pink (shade 255, an orange-y shade: a soft peachy salmon pink): 1 skein
- Washed Teal (shade 232, soft muted teal): 1 skein
- Crochet hook: size I
- Tapestry needle
- Scissors
- Finished size: about 33 inches by 40 inches
Quick and Simple Striped Crochet Blanket Instructions
Color key
Paper White = clean white; Stormy Gray = mid cool gray; Granite Gray = deeper slate gray; Vintage Pink = soft peachy salmon pink; Washed Teal = soft muted teal.
Abbreviations
ch = chain; dc = double crochet; sc = single crochet; sl st = slip stitch; st(s) = stitch(es).
Notes
Work through both loops. The ch 2 counts as a stitch. The sample used a chain of 104; any chain length works as long as it is a multiple of 3, plus 2 chains for the foundation row. Changing colors and weaving in ends securely is shown in the designer’s video.
Blanket Body
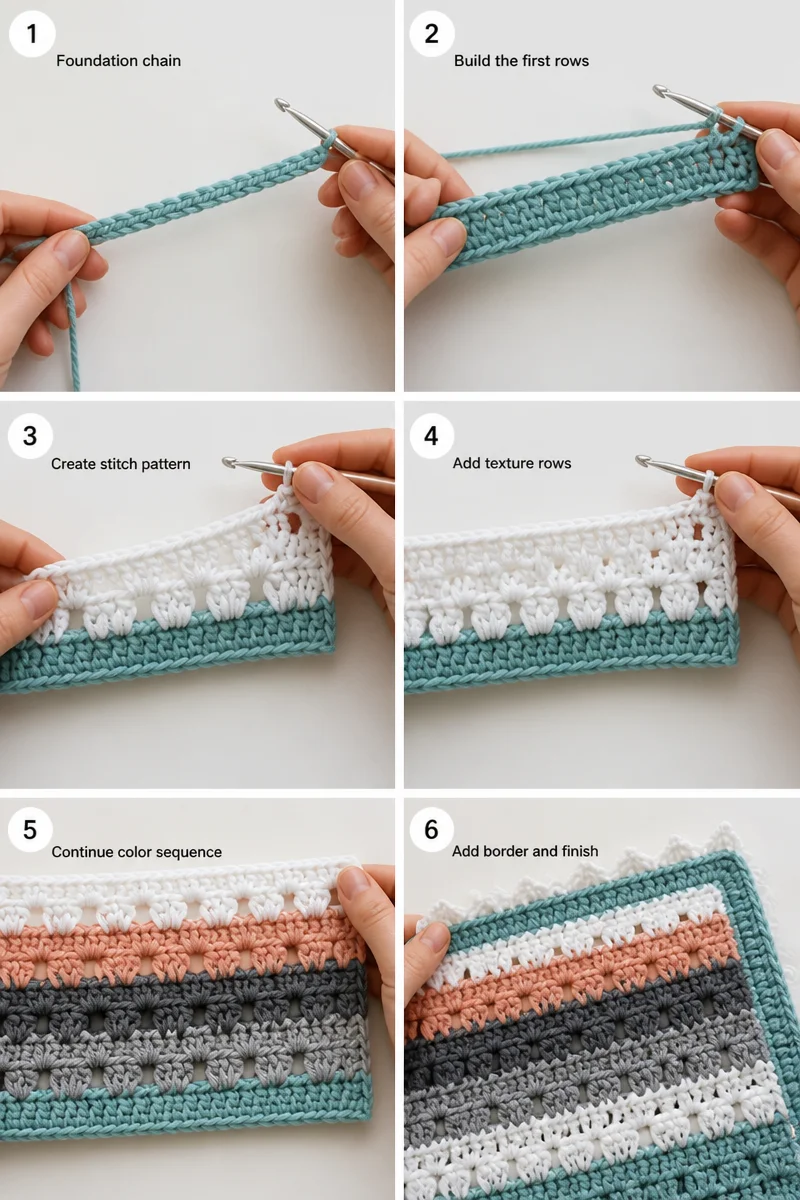
- Ch 104.
- Row 1 (Washed Teal): Starting in the 3rd ch from the hook, work 1 dc in each st across. Ch 2, turn.
- Row 2: Skip the first dc (the ch 2 counts as a dc) and work 1 dc in each st across. Cut the yarn and weave in the ends.
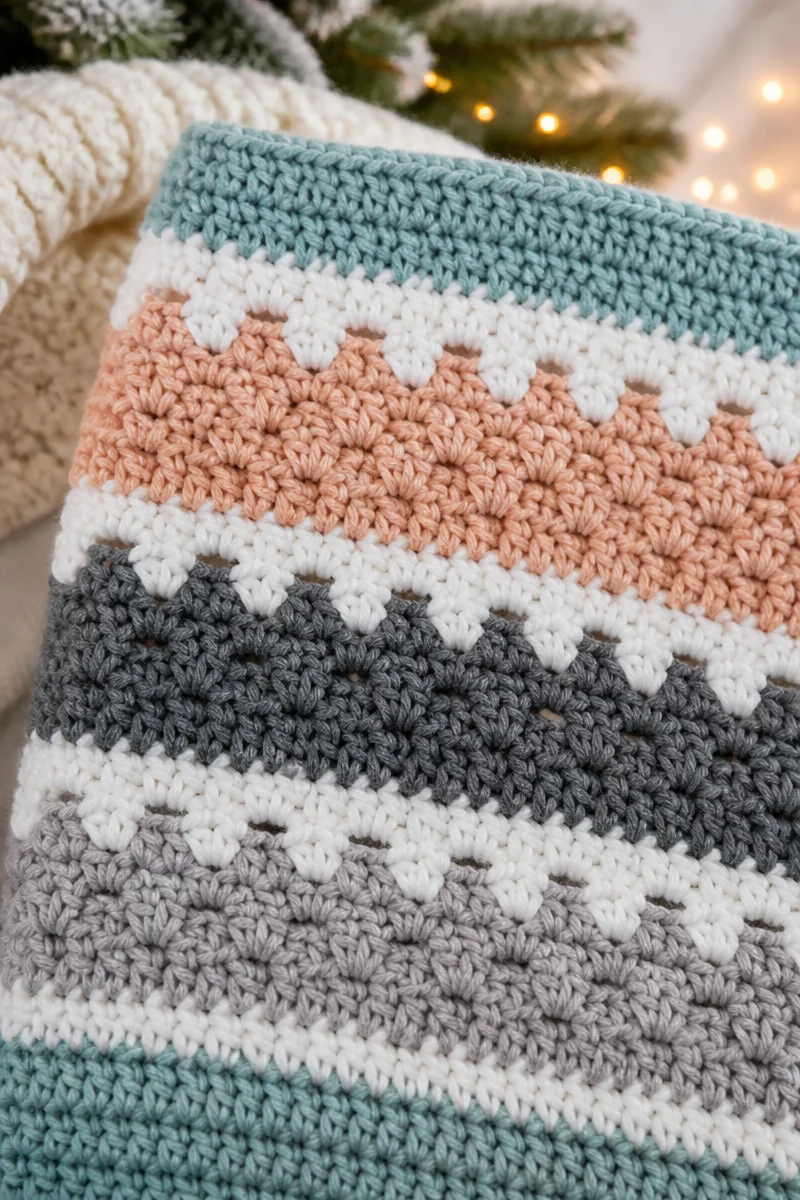
- Row 3 (Paper White): Ch 2, work 1 dc in the same st. *Skip 2 sts, 3 dc in the next st. Repeat from * until 3 sts remain. Skip 2 sts, 2 dc in the last st. Ch 2, turn.
- Row 4: Work 3 dc in the first space between the dc groups. Work 3 dc in each space across. Dc in the top of the last st. Ch 2, turn.
- Row 5: Skip the first dc (the ch 2 counts as a dc) and work 1 dc in each remaining st across until 1 st remains. Do not work into the top of the turning ch on this row. Ch 2, turn.
- Row 6: Skip the first dc (the ch 2 counts as a dc) and work 1 dc in each remaining st across. Cut the yarn and weave in the ends.
- Rows 7-8 (Vintage Pink): Repeat Rows 3 and 4, but cut the yarn and weave in the ends at the end of Row 8.
- Rows 9-10 (Granite Gray): Repeat Rows 5 and 6.
- Rows 11-12 (Stormy Gray): Repeat Rows 3 and 4, but cut the yarn and weave in the ends at the end of Row 12.
- Repeat the color pattern until the blanket is the size you want. To match the sample, repeat the color sequence 6 times, then finish with 2 rows of Washed Teal. Weave in the ends.
Border
- Rounds 1-2 (Washed Teal): Sc evenly around the blanket, working 3 sc in each corner. Cut the yarn and weave in the ends after the second round.
- Round 3 (Paper White, picot edging): Join the yarn at any corner of the blanket. Ch 1, sc in the same st and in the next 4 sts, ch 4, sc in the same st. *Sc in the next 5 sts, ch 4, sc in the same st. Repeat from * around. Sl st to the top of the first sc to join.
Tips for a Crochet Blanket Success
Comfortable posture
Choose a chair that supports your back, and let your shoulders rest rather than lifting them toward your ears. Keep your arms relaxed, with the work close enough that you do not need to reach forward.
Good lighting reduces eye strain and makes it easier to see what your hands are doing. Position a lamp so it illuminates your work without casting a strong shadow across it.
Even tension
Let the yarn glide through your fingers instead of gripping it tightly. A relaxed, repeatable hold helps the fabric stay flexible and makes the work more comfortable during longer sessions.
Try to keep your movements steady rather than forcing each loop into place. If your hand begins to tense, pause briefly and loosen your grip before continuing.
Track your place
Use a simple tally sheet to record progress as you finish each section of work. Marking completed portions can help you return after an interruption without needing to reconstruct your place from memory.
If you pause in the middle of a section, jot down a short note about what you completed and what comes next. Keep the note beside your project so it stays easy to find.
Check your work
Pause occasionally to inspect the fabric under good light. Look for missed loops, unexpected gaps, or areas where the texture changes, and address a small issue while it is still nearby.
Lay the work on a clean surface now and then to see how it is developing. This gives you a broader view than holding it in your lap and can help you notice uneven edges early.
Common Mistakes to Avoid
Skipping the swatch
Starting without a swatch can lead to a fabric that feels different from what you had in mind. A small test lets you assess the yarn and hook together before beginning a larger piece.
Wash or handle the swatch in the way you expect to care for the finished fabric. This can reveal whether the texture or drape changes, helping you make an informed choice before investing more time.
Pulling yarn too tight
Tight tension can make it difficult to insert the hook and can leave the fabric stiff. It often happens when a maker tries to control every loop by gripping the yarn too firmly.
Let the yarn move smoothly through your fingers and avoid tugging after each movement. If the work feels hard to handle, pause, relax your hands, and make a few test loops with a softer hold.
Miscounting stitches
It is easy to lose track when interrupted or when several similar loops sit close together. A count that changes unintentionally can affect the shape and balance of the fabric as it grows.
Count at natural stopping points, using a tally sheet to record the result if needed. If the count seems unexpected, check the most recent section before continuing so a small error does not carry forward.
Leaving ends too short
Short yarn tails can slip free more easily during finishing or regular use. Cutting close to the fabric before securing a tail can also make it difficult to thread and weave securely.
Leave enough yarn to handle comfortably when you join or finish a strand. Secure the tail by weaving it through the fabric in more than one direction, then trim only after it feels stable.
Changing yarn or hook midway
Switching materials midway can create a noticeable difference in texture, drape, or fabric density. Even yarns with the same general weight may behave differently because fiber, twist, and finish vary.
If a replacement is necessary, make a small test with the new yarn and hook before continuing. Compare its feel with the existing fabric, and keep any remaining original yarn together for repairs or finishing.
Ways to Make It Your Own
- Choose a different palette that suits your home or the person receiving it. A coordinated selection can feel calm, while a lively mix gives the gift a more playful mood.
- Try a different yarn in the same weight, considering fiber and texture as well as appearance. Check care information so the finished gift suits the recipient’s everyday routine.
- Make a matching second project, such as a cushion cover or small lap blanket, to create a coordinated set. Shared yarn choices can tie the pieces together naturally.
- Add a handwritten note that explains why you chose to make the gift. A personal message gives the recipient a keepsake to enjoy alongside the handmade item.
- Present the blanket in a reusable basket or a simple fabric bag. Include a small care card so the recipient can keep helpful washing information close at hand.
Care and Washing Instructions
Washing: Follow the yarn label for suitable washing methods and water temperature. When the label recommends gentle handling, avoid rough agitation and use a mild detergent. Keeping the item separate from rough fabrics can reduce snagging during laundering.
Drying: Support the fabric while moving it from the wash, since wet yarn can feel heavier than dry yarn. Lay it flat on a clean, dry surface and arrange it naturally; avoid hanging if the weight could stretch it.
Blocking: Gentle blocking can help a flat crocheted fabric settle into an even shape. Use a method appropriate for the fiber, avoid excessive heat, and let the fabric dry fully before folding or storing it.
Frequently Asked Questions
Can I use a different yarn?
Yes, a different yarn can work if its weight and care needs suit the kind of blanket you want. Fiber and texture affect how the fabric feels, drapes, and responds to washing. Test a small swatch first so you can judge the result before committing.
How can I keep my work even?
Aim for a relaxed, consistent grip instead of tightening each loop to make it look uniform. Pause when your hands feel tired, since fatigue can change your movements and tension. Checking your work under good light can help you notice changes while they remain easy to correct.
How can I count reliably?
Count at consistent stopping points and record your place on a tally sheet. If an interruption occurs, note what you completed before stepping away. When you return, use that record and inspect the nearby fabric to confirm your place.
What if it looks different than expected?
First consider whether lighting or the fabric’s natural drape is affecting your impression. Lay the work flat and look at it from a little distance before deciding whether anything needs attention. Small differences are common in handmade pieces, and gentle handling can help the fabric settle.
How long should yarn tails be?
Leave tails long enough to thread comfortably and secure through the fabric without tugging. The amount can vary with yarn thickness and the way you weave it in. Avoid trimming until the tail feels secure, then cut carefully without cutting the surrounding fabric.
More Ideas to Try
If you enjoy making useful crochet projects, consider a cushion cover, a cozy scarf, a decorative table runner, or a soft basket. Each offers a different way to explore texture and practical design while making something suitable for home or gifting. Small household projects can also help you practice planning and thoughtful material choices.
Conclusion
Give this handmade blanket a place on your list of satisfying projects, whether you plan to keep it close or offer it as a thoughtful gift. Take your time, enjoy the making, and let each session bring you closer to a finished piece you can feel proud of. Explore more crochet ideas on the blog whenever you are ready to find your next inspiration.