Crochet Baby Crown Photo Prop
Affiliate disclosure: This post may contain affiliate links. I may earn a small commission at no extra cost to you. See our Privacy Policy for details HERE.
- Why Crochet Crowns Are a Pinterest Favorite for Baby Photos
- Materials Needed (worsted yarn, 4mm hook, felt gems)
- Skill Level and Time to Complete
- Step-by-Step Instructions
- Styling Ideas for Milestone and Birthday Photos
- Sizing for Newborn Through Toddler
- FAQ (best yarn color for photos, how to keep points upright)
- Pin This Pattern for Later
- Common Questions
- Give It a Whirl—You’ll Be Glad You Did
Okay, so—crochet baby crown photo prop. I know, right out of the gate, this sounds a bit “Instagram mom” (guilty!), but stick with me. Ever tried to snap a sweet baby picture and something’s just… missing? Maybe you need a little pop—something tiny and regal and yet not all stiff and store-bought. That’s where a crochet baby crown comes in clutch. You’ll wanna make TWO as soon as you see how flipping cute it turns out.
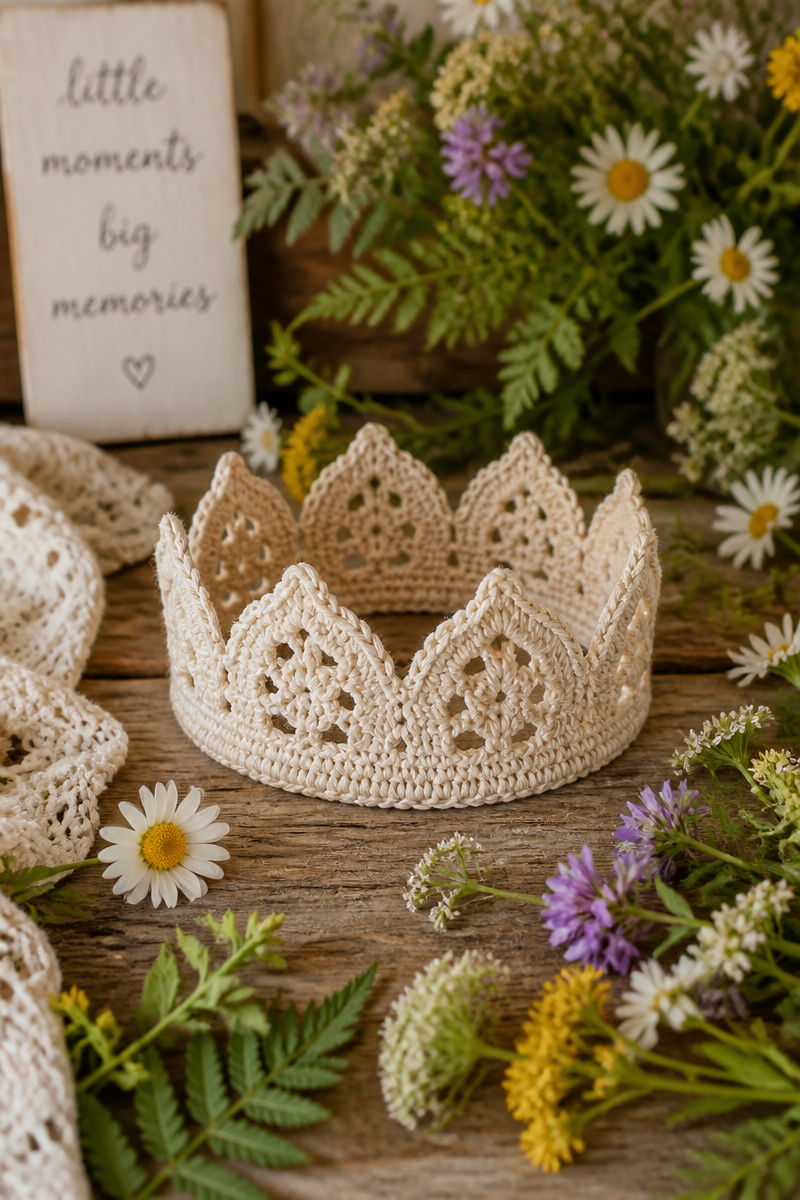
Why Crochet Crowns Are a Pinterest Favorite for Baby Photos
You’ve scrolled Pinterest. I have too—sometimes way too long, eyes burning, don’t tell my husband. There’s a reason these little crowns clog up your “baby photo prop” pinboard.
- Makes ordinary baby photos look five-star fancy—without dragging a suitcase of costumes.
- Soft yarn = happy baby (scratchy plastic tiaras? No thank you).
- These crowns can blur the “homemade vs. boutique” line—people will ask where you bought it.
- Bonus: Crowns are gender-neutral and timeless—seriously, who doesn’t look cute in a crown?
“You haven’t lived until you’ve seen your grumpy newborn suddenly look like royalty because of a handmade crochet crown! My friends begged for the pattern after our photoshoot.” — Jess T., North Carolina
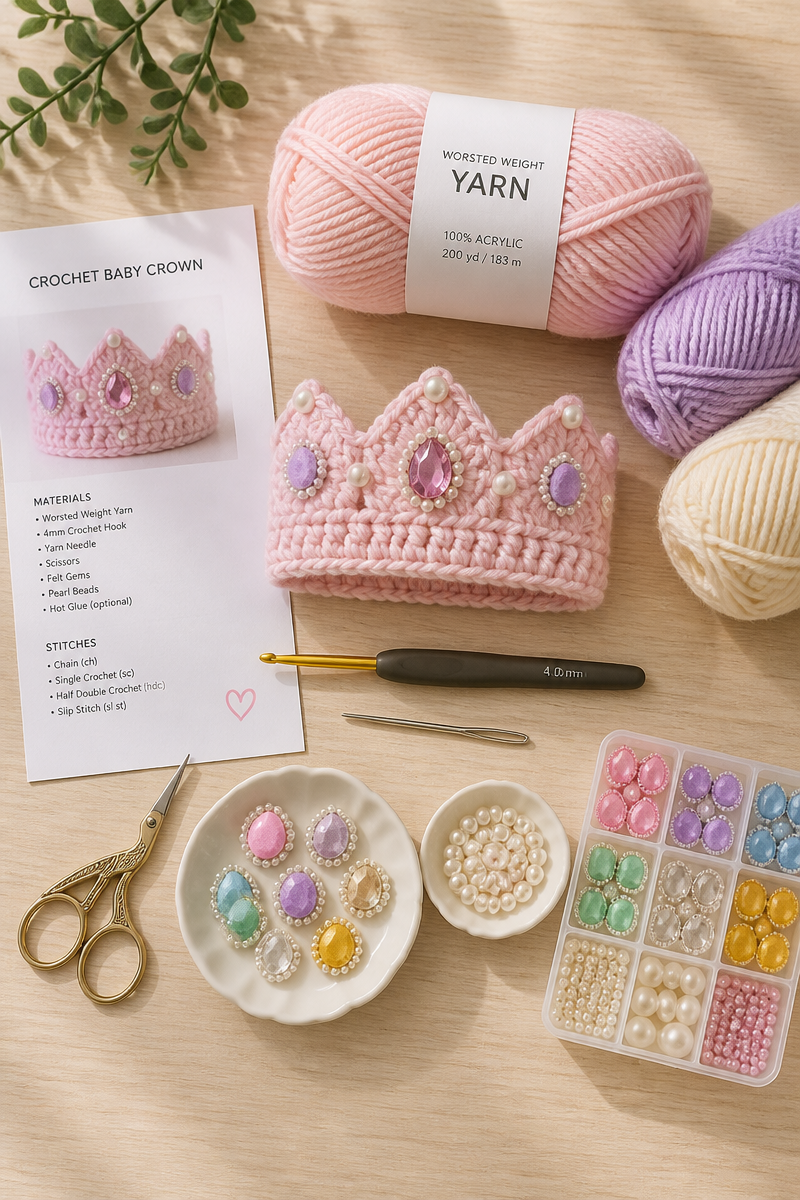
Materials Needed (worsted yarn, 4mm hook, felt gems)
Let’s keep this honest—no one likes a supply list that involves six craft stores and a PhD.
- Worsted weight yarn (I like soft cotton blends, thinks baby skin).
- 4mm crochet hook (you can fudge it up or down but 4mm is my jam).
- Felt gems or tiny pearls (from the dollar bin is perfect, don’t get fancy).
- Scissors and yarn needle (bet you have these in your junk drawer).
Skill Level and Time to Complete
Good news: you don’t need to be a grandma veteran. If you can handle single and double crochet, you’re golden.
- Skill level: Beginner to low-intermediate, promise.
- Time: About a TV episode—40 minutes with coffee breaks (unless you start over three times, which happens, just being real).
- Not much counting, so it won’t drive you bonkers.
Step-by-Step Instructions
Ready for the nitty gritty? Don’t sweat, I’ll walk you through.
{video_youtube}
Crocheting the Ribbed Headband
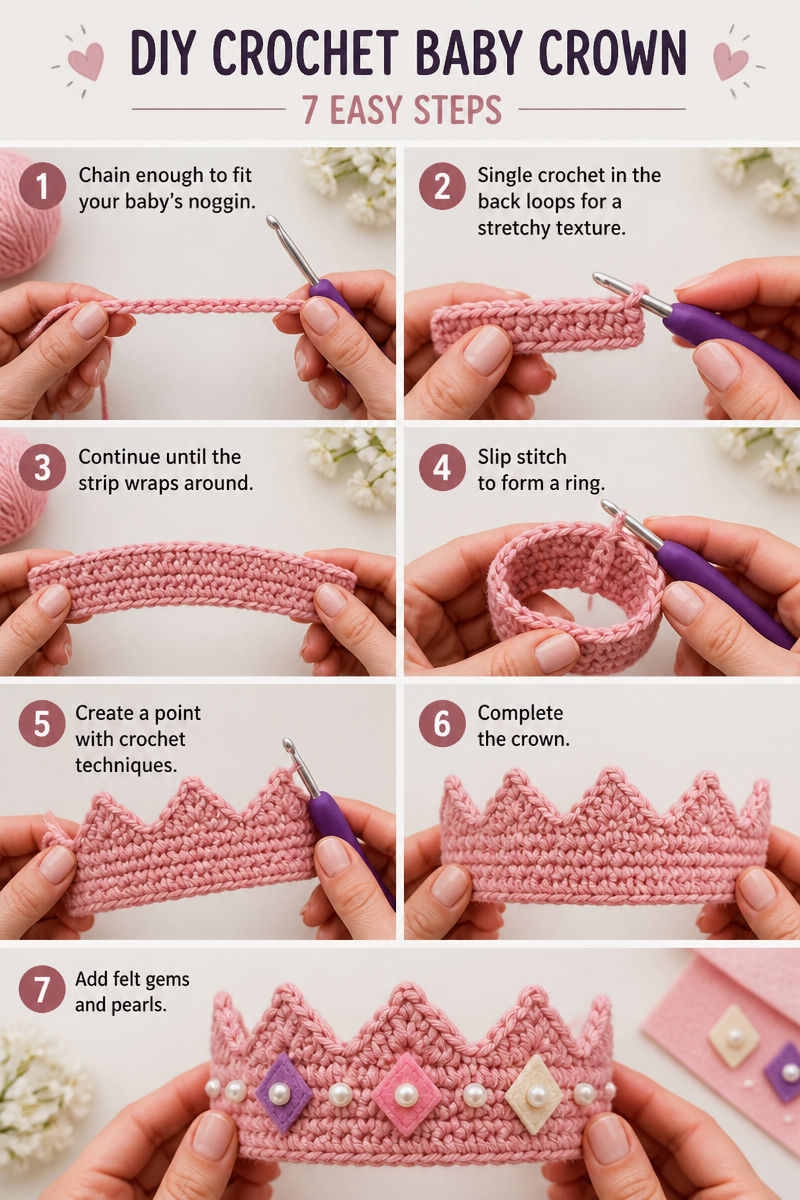
- Chain enough to fit your baby’s noggin (see sizing bit below).
- Turn and single crochet in the back loops only for a bumpy, stretchy texture.
- Keep going ’til your strip wraps around your baby’s head (I usually measure on a sleepy baby… risk, I know).
Shaping the Crown Points
- Slip stitch the ends together into a ring.
- Now, work up one “point”: chain, double crochet, chain, slip down—you get it.
- Go around the circle—peek now and then to admire your growing kingdom.
Adding Decorative Details
- Grab those felt gems, pearls, poor man’s glitter—glue/sew them on.
- Don’t overthink it! Imperfect = charm. (My first one looked like a hiccuping jellyfish. Still adorable.)
Styling Ideas for Milestone and Birthday Photos
So, you finished it and you’re obsessed. But how do you use it?
- Pop it on for a cake smash, pair with a plain onesie—instant “Pinteresty” without the stress.
- Stack with a tutu or keep it low-key with a swaddle.
- Works for siblings, twins, even older cousins (trust me, my toddler wore hers to the grocery store… drama queen and proud).
Sizing for Newborn Through Toddler
Don’t stress this—a slightly wonky crown still looks sweet.
- Newborn: chain about 32–34 rows (stretchy is good).
- 3-6 months: 36–38.
- Toddler: 40–44.
- If all else fails, just wrap your chain around their head and eyeball it.
FAQ (best yarn color for photos, how to keep points upright)
Q: “What’s the best yarn color for baby photos?” A: Go neutral: whites, creams, or even light grays. Pastels make the crown pop without stealing the spotlight.
Q: “How do you keep the crown points sticking up?” A: Firmer yarn and tight stitches help, but—here’s a hack—a light spritz of hair spray post-crochet works magic.
Q: “Can I run it through the wash?” A: Hand wash, gentle soap. Air dry. Or you will get a floppy pancake.
Q: “Any tips for fussy babies?” A: Distract with snacks. Or, honestly, snap fast—crowns are quick, tears are not.
Pin This Pattern for Later
If you survived teething, you can definitely make this crown. Don’t forget to save (and actually make!) the pattern—Future You will thank Past You on your next camera day.
Common Questions
Q: How long does it take start to finish?
A: For me—less than an hour, unless the dog or toddler interrupts (they always do).
Q: Can I scale up for older kids?
A: Totally! Just add more rows to your headband base. You can make a mama crown—bachelorette party, anyone?
Q: My yarn crown’s floppy, what gives?
A: Try a smaller hook or double up your yarn. Sometimes I even sneak in a strand of thread for firmness.
Q: Is there a way to personalize?
A: Add baby’s initials in tiny alphabet beads, or sew in a “one” for their birthday. Go wild.
Q: Could I sew the gems instead of hot glue?
A: Sew ’em if you have the time. Hot glue is fast, but sewn-on details survive the wash better.
Give It a Whirl—You’ll Be Glad You Did
So that’s my take on the crochet baby crown photo prop. It’s impossible not to smile when you make one (or three). Remember, the wonky ones always get the most compliments—don’t sweat perfection. Need more patterns? I love scrolling Ravelry for inspiration, or check out Yarnspirations for free stuff. Go dust off that old hook—you’ll get the cutest photos, I swear!