Crochet Baby Diaper Cover Pattern

Affiliate disclosure: This post may contain affiliate links. I may earn a small commission at no extra cost to you. See our Privacy Policy for details HERE.
Crochet baby diaper cover—oh, you know the one. Every new mom (or doting aunt!) runs into this: you’re hustling for baby gifts or baby’s first photo shoot, but all the cute stuff online costs an arm, a leg, and your last good nerve. But, get this—you can hook up a crochet baby diaper cover in a jiffy, and it’s way more personal! This is one project I keep coming back to, and honestly, it’s easier than you think. Plus, I swear, every time I give one as a gift, I get at least three requests for the pattern—so let’s get you sorted.
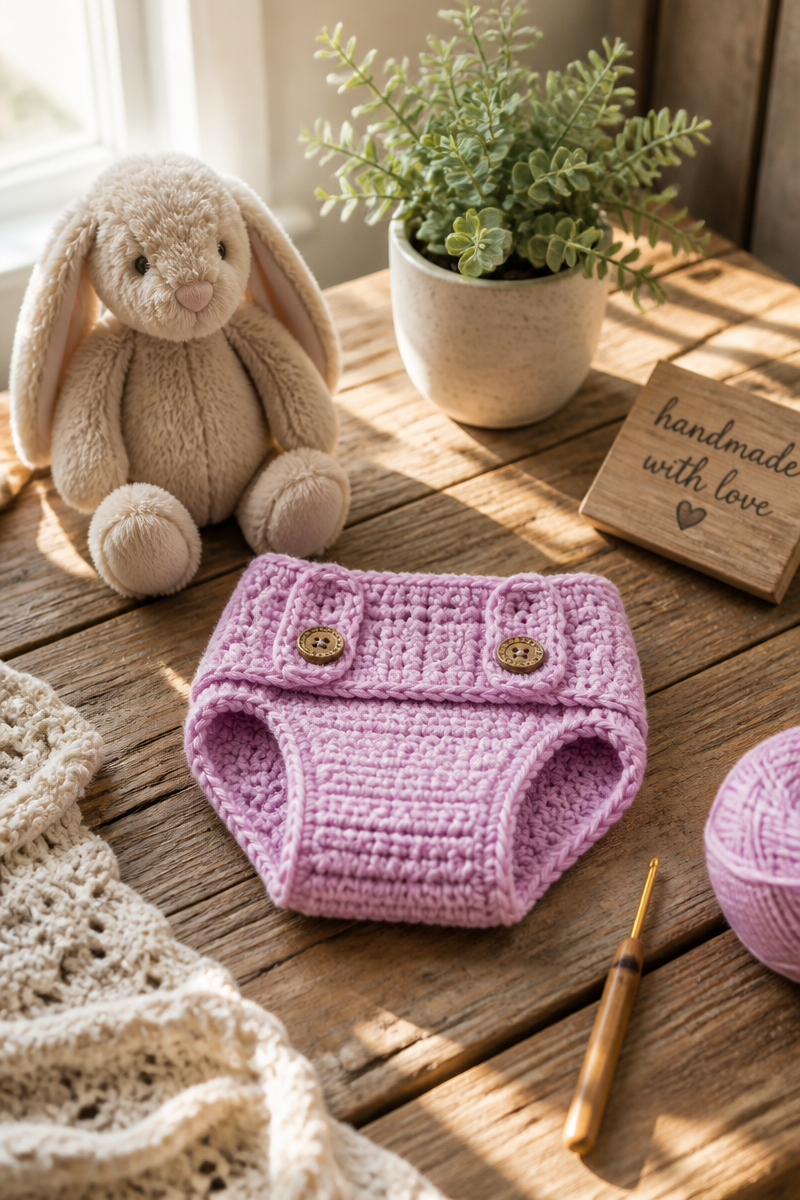
Why a Crochet Diaper Cover Is a Cute Photo-Ready Piece
- You know those squishy baby rolls? A cute diaper cover shows them off without being, you know, just a diaper.
- Big milestone coming up? This little handmade bit totally steals the show in photos.
- You can match the color to any theme—nursery, birthday, whatever wild idea you (or the parents) have.
- Added bonus: it covers up those not-so-glam commercial disposables. Score one for your camera roll!
“My sister still raves about the one I made for my niece’s first birthday pics—she’s framing the photos!”
— Julie M., actual sleep-deprived auntie
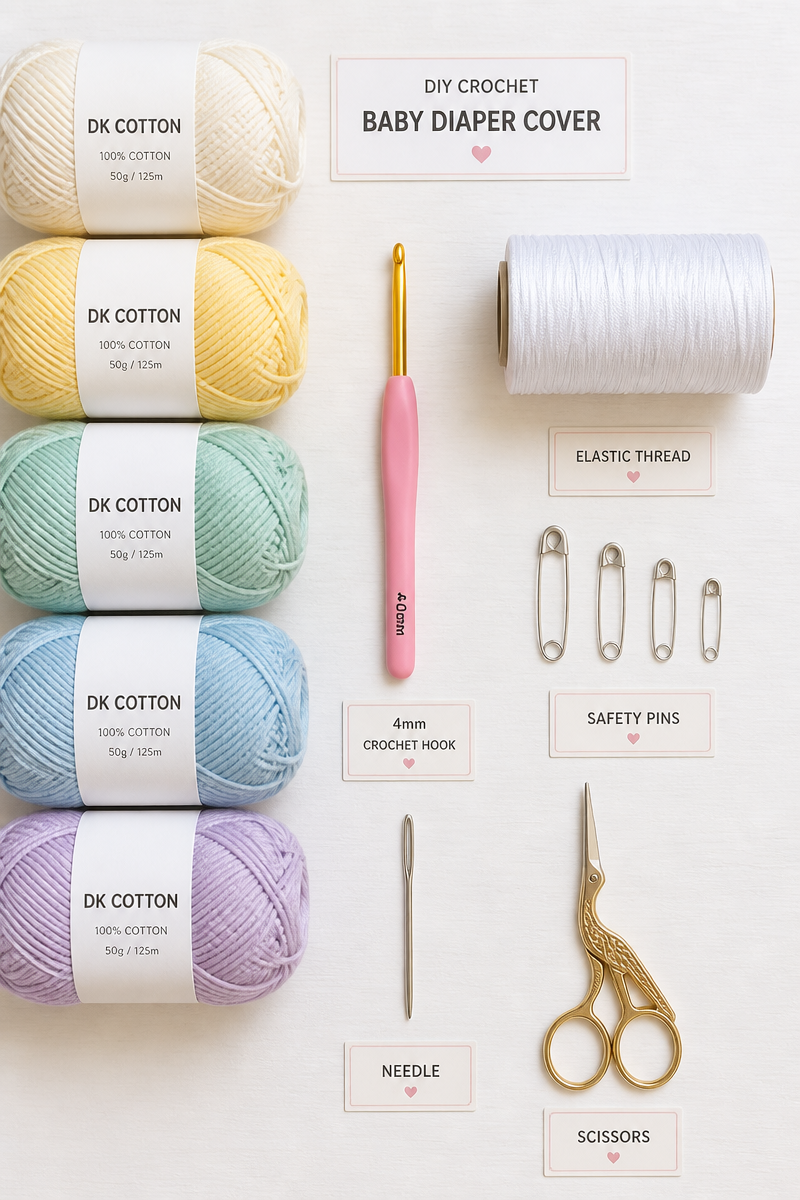
Materials Needed
- DK cotton yarn (soft = happy baby bottoms; trust me, don’t go with the scratchy stuff)
- 4mm crochet hook (that plain aluminum hook? Good to go)
- Elastic thread (just a bit—it’s a game-changer for the waist and legs, keeps the cover on through all that wiggling)
- Safety pins and needle (don’t skip these or you’ll be muttering under your breath later)
- Scissors, obvs
Skill Level and Time to Complete
- Totally beginner-friendly. Like, if you can manage a double crochet, you’re 90% there.
- On average, I whip one up in about 2 hours. Sure, three if you watch Netflix and forget where you are (not that I do that or anything…).
- No tricky shaping, just good ol’ rectangles.
Step-by-Step Instructions
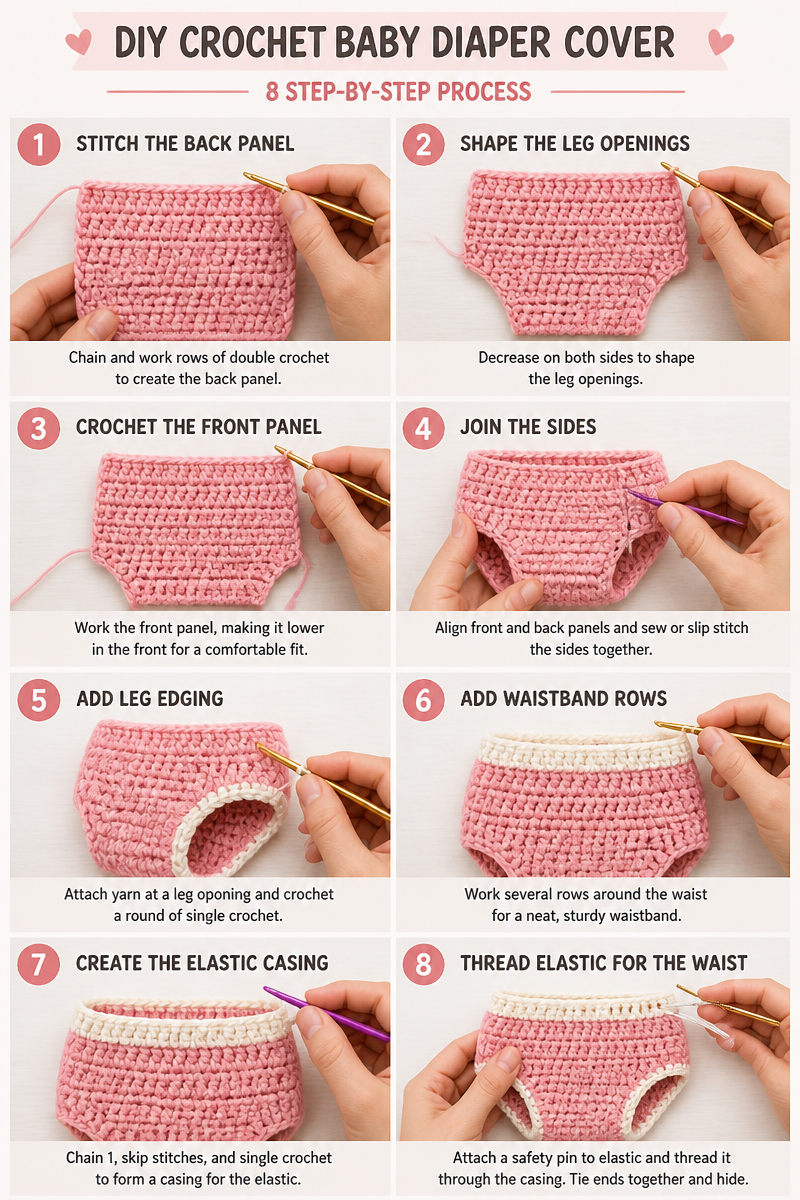
Crocheting the Back and Front Panels
- Start with the back panel—chain enough so it’s wide enough for your little bean’s booty.
- Work straight rows in simple stitch (half double crochet is my fav, but get wild!).
- Decrease a stitch at each end for the front to shape a touch—nothing too complicated.
Joining the Side Seams
- Fold your panels, matching up the sides.
- Whipstitch or single crochet up the sides—don’t stress if it looks a little wonky, babies don’t judge.
Adding Elastic to Waist and Legs
- Thread elastic through the top row for the waistband; same trick around each leg opening.
- Knot it firmly, but not so tight your diaper cover starts morphing into a scrunchie.
- I always try it over an actual diaper at this point—just to double-check fit.
Sizing Guide From Newborn to Toddler
- For newborns (0–3 months): 14” around the waistband, approx. 6” long.
- Six months old: 16” around, maybe 7” long.
- Toddler (around age 2): 18–20” around, 8+” long.
- Always leave room for a little stretch—and err on the bigger side, it’s amazing how fast they grow (says the pile of outgrown handmade baby clothes I keep “just in case”).
Styling for Milestone and Summer Photos
- Match with a little crochet hat or bow for serious “awww” power.
- Light colors look fresh for summer, but I’m always a sucker for mustard yellow or soft pastels.
- Add a wood button or faux drawstring—everyone will think it’s from a five-star boutique.
- Just a onesie, this cover, and BOOM: Instagram moment.
FAQ
What yarn is best for stretchy waistbands?
I stick with cotton yarn and a touch of soft elastic thread. Acrylic’s okay, but it gets… squeaky? Weirdly hot?
How snug should the cover fit?
Comfy but not tight. If you can slide a finger in around the waist easily, you’re set.
Can you wash these covers?
Yep! Gentle cycle, lay flat to dry. They hold up surprisingly well.
Help, my elastic thread keeps popping out!
Secure both ends inside the waist/leg band and stitch them down if you’re worried. Or, go wild and double it up.
Pin This Pattern for Later
If you’re a Pinterest fiend like me, you’ll want to save this crochet baby diaper cover tutorial for “someday,” right? It’s so worth having it handy for last-minute gifts, next baby shower, or—let’s be honest—your own dash of nostalgia.
Common Questions
How long will it take if I’m inexperienced?
Honestly, probably 3-ish hours—maybe a weekend project. Don’t stress. You’ll get faster!
What if my cover comes out too big?
Thread a bit more elastic—problem kinda solved. For too small… well, you’ve got a cute teddy bear diaper cover now.
Is it okay to use different yarn weights?
Technically sure, but sizing changes fast. DK is the sweet spot for thickness.
Can I add ruffles or other decorations?
Oh, for sure. Ruffles, bows, even mini animal ears—Pinterest rabbit hole, incoming.
What do I do if the baby’s allergic to cotton?
Go for bamboo yarn—super soft, no drama.
Ready to Hook Your Own? Go For It!
If you’ve read this far, you’re probably itching to start your very own crochet baby diaper cover (honestly, why not? The world needs more cute baby bums). Don’t overthink—grab a hook, pick out the softest yarn, and just go for it. If you get stuck, there’s always a detailed video tutorial or a friendly face in your local yarn shop ready to lend a hand. And hey, get ready for compliments (and requests) when you show off that adorable, handmade result!