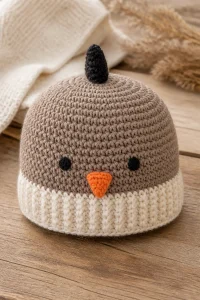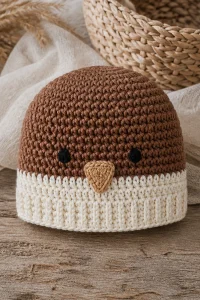
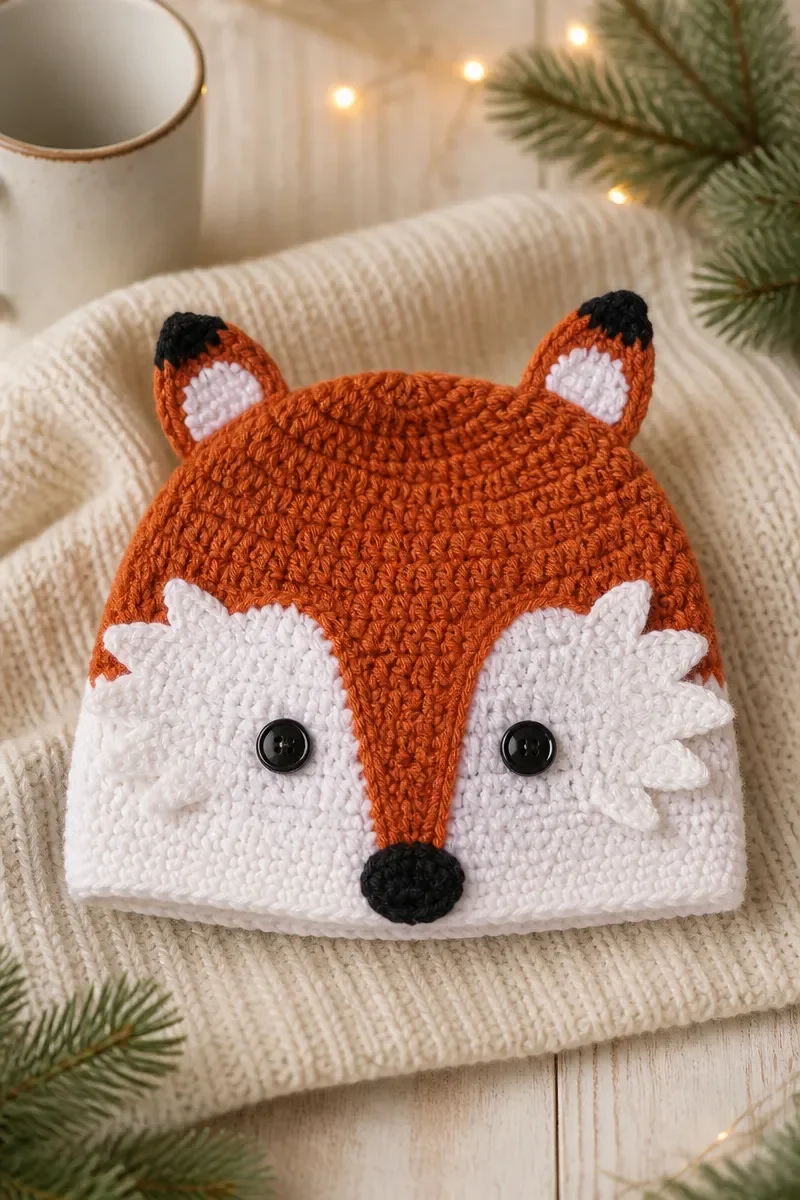
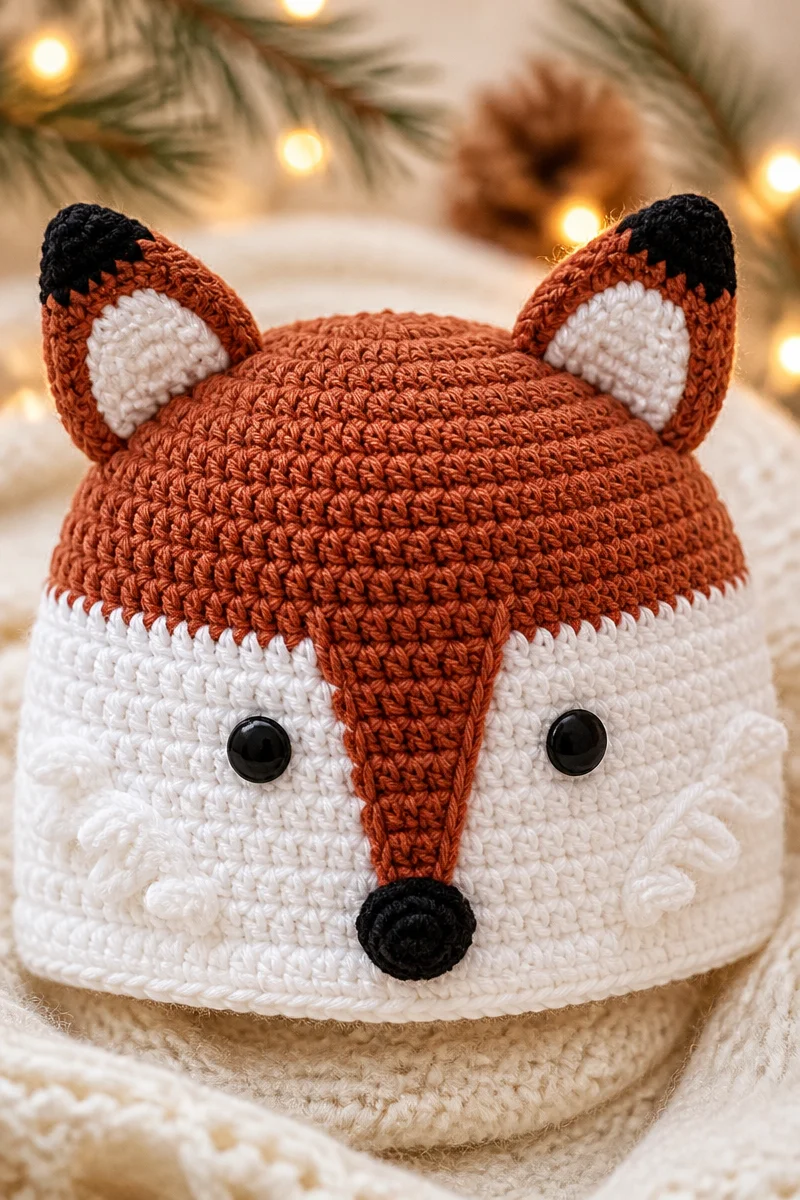
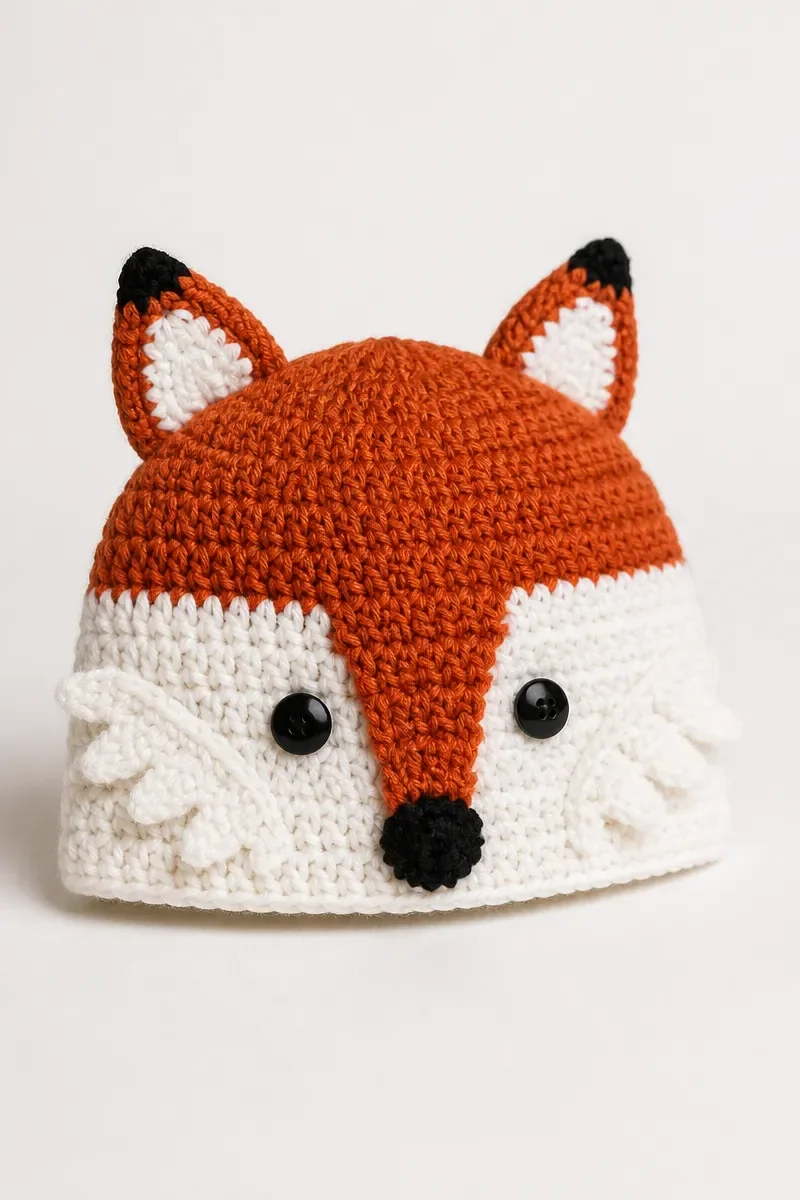
Cozy Woodland Fox Crochet Baby Hat

Affiliate disclosure: This post may contain affiliate links. I may earn a small commission at no extra cost to you. See our Privacy Policy for details HERE.
- What Is a Baby Hat?
- Why This Is a Great Choice for a Baby Hat
- Before You Start
- Yarn and Hook Recommendations
- Materials
- Cozy Woodland Fox Crochet Baby Hat Instructions
- Hat, rounds 1-4 (all sizes, start with Terracotta)
- Hat, size 0-3 months
- Hat, size 3-6 months
- Hat, size 6-9 months
- Hat, size 9-12 months
- Nose bridge (Terracotta)
- Nose (Black)
- Cheek fluff, right side (White)
- Cheek fluff, left side (White)
- Small ears (0-12 month hats), make 2 (Terracotta)
- Small inner ears, make 2 (White)
- Finishing
- Tips for a Baby Hat Success
- Common Mistakes to Avoid
- Ways to Make It Your Own
- Care and Washing Instructions
- Frequently Asked Questions
- More Ideas to Try
- Conclusion
The Cozy Woodland Fox Crochet Baby Hat is a handmade crochet project for a baby. Its playful woodland theme makes it a thoughtful way to bring a little handmade charm to a practical item.
This project may appeal to crocheters who enjoy making useful gifts for little ones, as well as anyone looking for a welcoming project to share with family and friends. The finished hat can be given at a baby shower, saved for a new arrival, or made for a child in your care.
Making it offers a chance to practice patience, work carefully, and enjoy the steady progress of a handmade creation. Completing a thoughtful gift can also build confidence and encourage you to try more projects.
What Is a Baby Hat?
A baby hat is a small wearable crochet project made to cover a young child’s head. It is valued for its practical purpose and its potential to become a personal, handmade keepsake.
This kind of project is usually designed to feel comfortable and sit gently on the head. A flexible crocheted fabric can adapt to movement, while a smooth, even surface helps the finished item look neat and feel pleasant.
Crocheters like baby hats because they are useful, giftable, and open to creative interpretation. They can suit everyday wear, special photographs, or a coordinated set, and they offer room to explore different looks while making something with a clear purpose.
Why This Is a Great Choice for a Baby Hat
-
Useful gift: A handmade baby hat makes a practical present for families preparing for a new arrival. It can be included in a gift bundle or offered on its own with a personal message.
-
Personal touch: Handmade work carries the maker’s care in a way that feels meaningful. A recipient can appreciate the time and attention behind a useful item made especially for their family.
-
Creative expression: This project gives you space to enjoy a playful theme and make a piece with a distinctive look. Choosing how to present it lets your own taste come through.
-
Portable project: Crochet is easy to take along when you have a comfortable place to sit. A project with manageable progress can fit into quiet moments at home or while visiting loved ones.
-
Confidence builder: Completing a useful item can encourage you to take on new ideas. Each careful decision helps you develop a steadier approach to handmade work and thoughtful gift making.
Before You Start
-
Make a gauge swatch to see how your crocheting compares with the intended fabric. A small test can reveal whether your natural tension needs adjusting before you begin the main work.
-
Read the entire project from beginning to end before picking up your hook. Knowing the overall flow helps you prepare for decisions and notice places where you may want to pause.
-
Keep a notebook or tally sheet handy to record progress and personal observations. A short written note can make it easier to return after a break without relying on memory.
-
Organize your yarn and wind it into manageable balls before starting. Keeping supplies tidy helps prevent tangles and lets you focus on the work rather than sorting yarn midway.
Yarn and Hook Recommendations
-
Choose a fiber that feels comfortable against delicate skin. Soft wool blends, cotton, and acrylic options each behave differently, so consider the intended use and how the fabric feels in your hands.
-
Select a yarn weight that suits the project’s intended drape and warmth. A consistent weight makes it easier to create an even fabric and compare your gauge swatch with your working piece.
-
Smooth yarn helps you see the structure of your work clearly. Highly textured yarn can hide small details, making it harder to notice uneven tension or identify where the hook should enter.
-
Light, clear shades can make the surface easier to inspect, while darker shades may make individual loops harder to see. Good lighting helps you work comfortably with either choice.
-
Use the hook size that produces a fabric with the feel and density you want. A swatch lets you compare the results and choose a comfortable balance between flexibility and structure.
-
If changing yarn, check that its care needs suit the recipient and intended use. Similar weight does not guarantee identical fabric, so make a fresh swatch before committing to a substitute.
Materials
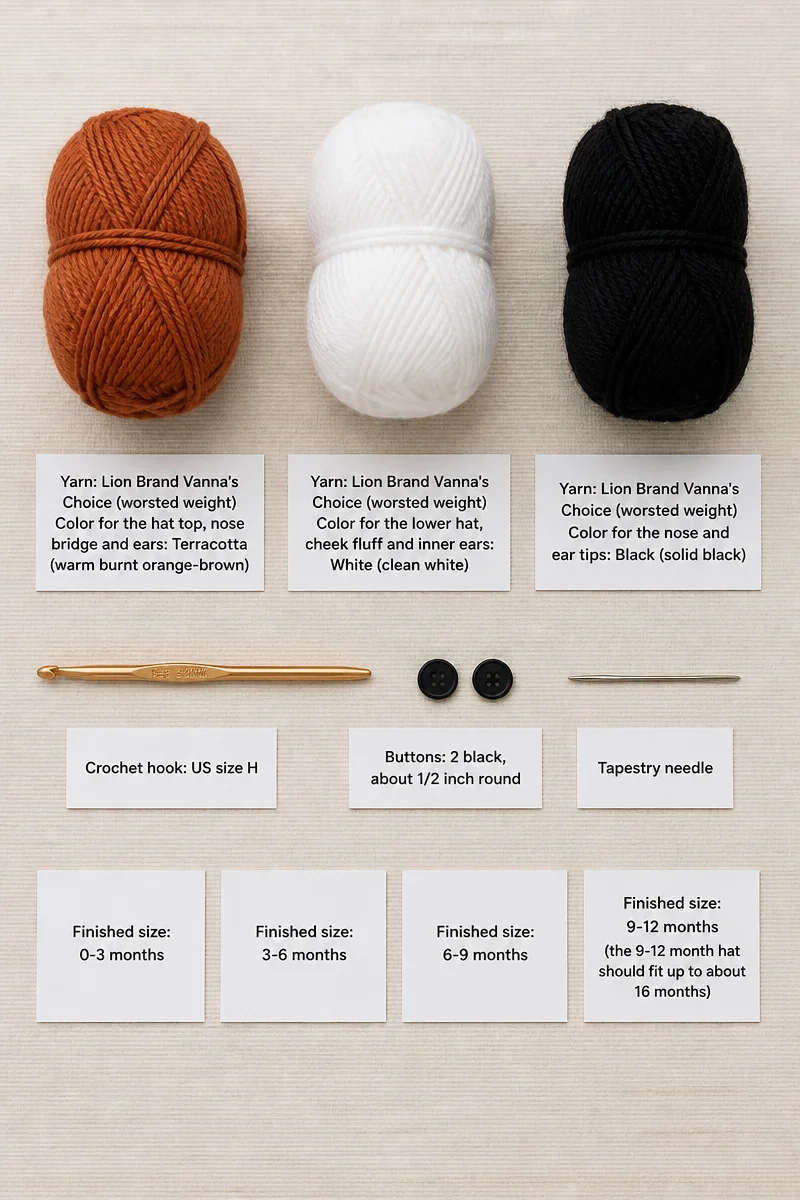
- Yarn: Lion Brand Vanna’s Choice (worsted weight)
- Color for the hat top, nose bridge and ears: Terracotta (warm burnt orange-brown)
- Color for the lower hat, cheek fluff and inner ears: White (clean white)
- Color for the nose and ear tips: Black (solid black)
- Crochet hook: US size H
- Buttons: 2 black, about 1/2 inch round
- Tapestry needle
- Finished size: 0-3 months, 3-6 months, 6-9 months, 9-12 months (the 9-12 month hat should fit up to about 16 months)
Cozy Woodland Fox Crochet Baby Hat Instructions
Color key: Terracotta = warm burnt orange-brown; White = clean white; Black = solid black.
-
Abbreviations: ch = chain; sc = single crochet; sc dec = single crochet decrease; hdc = half double crochet; hdc dec = half double crochet decrease; dc = double crochet; dc dec = double crochet.
-
Notes: Rounds are joined with a sl st to the first dc and each round starts with ch 2.
Hat, rounds 1-4 (all sizes, start with Terracotta)
-
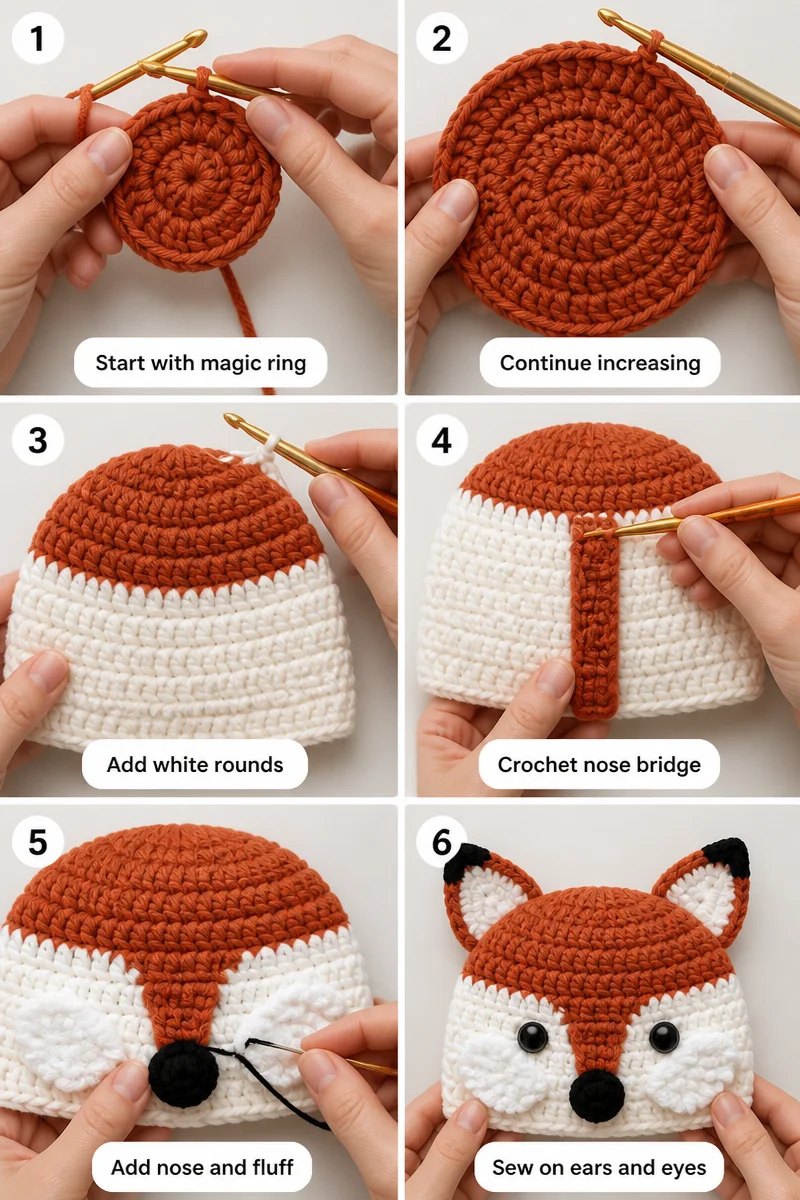
Round 1: Make a magic ring, ch 2 and work 11 dc in the ring, join to the first dc, ch 2.
-
Round 2: 2 dc in each st around, join, ch 2. (22 dc)
-
Round 3: 2 dc in the first st, dc in the next st; repeat around, join, ch 2. (33 dc)
-
Round 4: 2 dc in the first st, dc in the next 2 sts; repeat around, join, ch 2. (44 dc)
Hat, size 0-3 months
-
Change to White after round 6.
-
Rounds 5-10: Dc in each st around, join, ch 2. (44 dc)
-
Round 11: Sc in each st around, join, fasten off and weave in the ends. (44 sc)
Hat, size 3-6 months
-
Round 5: 2 dc in the first st, dc in the next 10 sts; repeat around, join, ch 2. (48 dc)
-
Change to White after round 7.
-
Rounds 6-11: Dc in each st around, join, ch 2. (48 dc)
-
Round 12: Sc in each st around, join, fasten off and weave in the ends. (48 sc)
Hat, size 6-9 months
-
Round 5: 2 dc in the first st, dc in the next 10 sts; repeat around, join, ch 2. (48 dc)
-
Round 6: 2 dc in the first st, dc in the next 11 sts; repeat around, join, ch 2. (52 dc)
-
Change to White after round 8.
-
Rounds 7-12: Dc in each st around, join, ch 2. (52 dc)
-
Round 13: Sc in each st around, join, fasten off and weave in the ends. (52 sc)
Hat, size 9-12 months
-
Round 5: 2 dc in the first st, dc in the next 10 sts; repeat around, join, ch 2. (48 dc)
-
Round 6: 2 dc in the first st, dc in the next 11 sts; repeat around, join, ch 2. (52 dc)
-
Round 7: 2 dc in the first st, dc in the next 12 sts; repeat around, join, ch 2. (56 dc)
-
Change to White after round 9.
-
Rounds 8-13: Dc in each st around, join, ch 2. (56 dc)
-
Round 14: Sc in each st around, join, fasten off and weave in the ends. (56 sc)
Nose bridge (Terracotta)
-
Turn the hat upside down and find the 6 sts in the middle of the hat; it does not need to be exact because any spot can be the middle before the other features are added.
-
Row 1: Attach Terracotta along the last row of Terracotta sts, ch 1 and work 1 sc in each of the next 6 sts, ch 1, turn. (6 sc)
-
Row 2: Sc dec, sc in the next 2 sts, sc dec, ch 1, turn.
-
Row 3: Sc in each st across, ch 1, turn. (4 sc)
-
Repeat Row 3 until the nose bridge is long enough to reach the base of the hat. Fasten off leaving a long tail. Sew all sides of the nose bridge to the hat.
Nose (Black)
- Make a magic ring, ch 2 and work 2 dc, hdc, 2 sc, hdc, 2 dc, hdc, 2 sc, hdc, then join to the first dc. Pull tight and leave a long tail to sew onto the base of the nose bridge.
Cheek fluff, right side (White)
- Attach yarn over the dc at the edge of the last row of the hat. Ch 6, sc in the 2nd ch from the hook, hdc dec over the next 2 sts, dc dec over the last 2 sts, join with a sc to the next dc at the hat edge. Ch 5, hdc dec over the first 2 sts, dc dec over the last 2 sts, join with a sc to the next dc row on the hat. Ch 3, hdc dec and join to the next dc at the hat edge. Fasten off and weave in the ends.
Cheek fluff, left side (White)
-
Start on the 4th White dc row up from the bottom of the hat. Attach yarn, ch 3, sc in the 2nd ch from the hook, hdc in the last ch, join to the next dc space at the edge. Ch 4, sc in the 2nd ch from the hook, hdc in the next ch, dc in the last ch, join to the next dc space at the edge. Ch 5, sc in the 2nd ch from the hook, dc in each of the next 2 chs, 2 dc in the last ch, join, fasten off and weave in the ends.
-
Notes: This fluff pattern suits the 0-3 month hat. For a larger hat, add more fluff spikes to fill the white area. The fluff may look better pointing downward; if so, swap the right and left side patterns.
Small ears (0-12 month hats), make 2 (Terracotta)
-
Ch 9, sc in the 2nd ch from the hook and in each ch down the chain, ch 1, turn. (8 sc)
-
Row 2: Sc dec, sc in the next 4 sts, sc dec over the last 2 sts, ch 1, turn.
-
Row 3: Sc in each st across, ch 1, turn. (6 sc)
-
Row 4: Sc dec, sc in the next 2 sts, sc dec over the last 2 sts, ch 1, turn.
-
Row 5: Sc in each st across, ch 1, turn. (4 sc)
-
Row 6: Sc dec twice, then keep working sc around the edge of the ear. When you are back at the top, attach Black and work sc, ch 1, sc along the top to make the black ear tip.
Small inner ears, make 2 (White)
-
Ch 7, sc in the 2nd ch from the hook and in each ch down the chain, ch 1, turn.
-
Row 2: Sc dec, sc in the next 2 sts, sc dec, ch 1, turn.
-
Row 3: Sc across. (4 sc)
-
Row 4: Sc dec over the next 2 sts, ch 1, turn.
-
Row 5: Sc dec, then keep working sc around the edges of the ear. Fasten off leaving a long tail to sew the inner ear onto the outer ear.
Finishing
- Attach the button eyes.
Tips for a Baby Hat Success
Comfortable posture
Sit with your shoulders relaxed and your elbows supported, keeping your hands close enough to avoid reaching forward. Shift position occasionally if your neck or wrists begin to feel strained.
Choose a seat that lets you see your work without hunching. A small adjustment to your chair or the angle of your hands can make a longer crafting session more comfortable.
Steady tension
Let the yarn glide through your fingers rather than gripping it tightly. A relaxed hold helps keep the fabric flexible and makes your movements feel more natural.
Try to use a similar rhythm as you work, especially when you pause and resume. If your hand feels tense, set the hook down briefly and loosen your grip before continuing.
Marking progress
Use a consistent way to remember where you are, such as a written tally or a small note beside your work. Update it as soon as you complete a section, rather than relying on memory later.
If you stop for a while, leave a note about your place and what you plan to do next. Clear notes can help you restart calmly without spending time reconstructing your progress.
Checking your work
Pause occasionally to look over the fabric in good light. Small irregularities are easier to address when you notice them early, rather than after they have continued for some distance.
Compare the overall appearance from different angles and handle the fabric gently. A quick visual check can help you spot changes in density or shape before moving on.
Common Mistakes to Avoid
Skipping the swatch
Without a swatch, your fabric may turn out more open or dense than you expected. Yarn and hook choices interact with personal tension, so a small test can reveal useful information before a larger project begins.
Make a sample using the same yarn and hook you plan to use. Wash or handle it as appropriate for the yarn, then consider whether its feel and drape suit your purpose.
Pulling too tightly
A tight grip can make the hook difficult to move and create rigid fabric. It may also tire your hands, especially when you work for an extended stretch.
Let the yarn feed smoothly and avoid tugging each new loop into place. If the fabric feels stiff, pause and consciously relax your fingers before continuing.
Miscounting stitches
It is easy to lose track when the fabric is turned, the yarn is interrupted, or the work is put aside. A missed or extra stitch can affect the appearance and proportions of the finished fabric.
Count at regular intervals and use a tally sheet to record completed sections. If a count seems wrong, review the most recent work while the source of the discrepancy is still easy to locate.
Short yarn tails
Leaving very short tails can make it difficult to secure and weave them in neatly. The ends may also be more likely to loosen with handling if there is not enough yarn to work with.
Leave a comfortable length whenever you finish a strand or begin a new one. Weave the tail through several nearby loops, changing direction where possible, and trim only after it feels secure.
Switching supplies midway
Changing yarn or hook partway through can alter the fabric’s feel and appearance. Even a similar replacement may behave differently because fibers, twist, and individual tension vary.
If you need to substitute a supply, test the new combination on a sample first. Matching the working conditions as closely as possible helps keep the fabric more consistent throughout.
Ways to Make It Your Own
- Choose a different color palette that reflects the recipient’s taste or nursery style. A calm combination can feel classic, while a lively mix gives the gift a cheerful, playful mood.
- Try a different yarn of the same weight if it suits the intended use. Consider how the fiber feels, washes, and drapes before selecting a substitute for your handmade project.
- Make a matching second project to create a coordinated set. Similar colors or a shared theme can tie the pieces together without requiring them to look exactly alike.
- Give the finished gift with a handwritten note sharing why you chose it. A warm personal message can make a practical present feel especially thoughtful and memorable.
- Present it in a reusable gift bag or a small keepsake box. A simple presentation adds care to the occasion and gives the recipient another useful item to enjoy.
Care and Washing Instructions
Washing: Follow the yarn label for suitable washing methods and care recommendations. If the label allows machine washing, consider placing the item in a protective laundry bag, and use a gentle approach to help preserve its shape and surface.
Drying: Avoid twisting or wringing the fabric, since forceful handling can stretch it. Remove extra moisture gently with a clean towel, then lay the item flat in a well-ventilated place to dry fully before storing.
Storing: Keep the hat clean and completely dry before putting it away. Store it in a dry location away from direct sunlight, and avoid crushing it beneath heavy items so it retains its shape.
Frequently Asked Questions
Can I use a different yarn?
Yes, a different yarn can work if its weight and feel suit the project. Compare its care needs with the intended use before deciding.
Make a small swatch with the replacement yarn and hook to assess the fabric. Similar labels do not guarantee that two yarns behave alike.
If the swatch feels suitable, use the same yarn throughout for a consistent result. Keep the original yarn information available in case you need a match later.
How do I keep my work even?
Use a relaxed grip and let the yarn move freely through your fingers. Consistent movement can help create fabric with a more uniform appearance.
Pause when your hands become tense, then resume with a comfortable hold. Trying to force a steady pace can make your movements less natural.
Check your work under good lighting and look for changes in density. Small adjustments made early can help maintain a more consistent result.
How can I count reliably?
Count as you work instead of waiting until a long stretch is complete. A simple tally sheet can record your progress and reduce reliance on memory.
Pause at natural stopping points and mark where you are before putting the project aside. Clear notes make it easier to resume without guessing.
If the count does not match your record, review the most recent section calmly. Finding the discrepancy early can make correction less confusing.
What if it looks different than expected?
Small differences can come from tension, yarn behavior, or personal interpretation of the overall look. Compare the fabric calmly before deciding whether anything needs adjustment.
Look at the whole piece from a comfortable distance, not only at individual loops. The overall impression may feel more balanced than a close inspection suggests.
If you remain unsure, ask another crocheter for a thoughtful opinion. A fresh perspective can help you decide whether the difference matters to you.
How long should yarn tails be?
Leave tails long enough to weave securely through nearby fabric. The amount can vary with yarn thickness and the way you plan to hide the end.
Avoid trimming a tail before you have woven it in and checked that it feels secure. Extra length gives you more room to work comfortably.
When joining yarn, leave a usable tail at both ends of the join. Keeping those ends manageable can make later handling neater and less frustrating.
More Ideas to Try
If you enjoy making thoughtful handmade gifts, consider trying a baby blanket, a soft toy, a small bag, or a matching set of nursery accessories. Each offers a different way to explore a playful theme and create something useful or personal. You could also make a coordinated collection for a family celebration, choosing projects that suit the recipient’s routines and preferences.
Conclusion
Give the Cozy Woodland Fox Crochet Baby Hat a try when you are ready to make a warm, personal gift for a little one. Take your time, enjoy the care that goes into handmade work, and let the finished creation reflect your thoughtfulness. Explore more crochet ideas on the blog whenever you feel inspired to plan another project.