Crochet Baby Name Banner Decor
Affiliate disclosure: This post may contain affiliate links. I may earn a small commission at no extra cost to you. See our Privacy Policy for details HERE.
- Crochet Baby Name Banner Decor
- Why a Crochet Name Banner Personalizes the Nursery
- Materials Needed (worsted cotton yarn, twine, 4mm hook)
- Skill Level and Time to Complete
- Step-by-Step Instructions
- Font and Color Ideas for Nursery Themes
- Hanging and Display Tips
- FAQ (how to letter each flag, best length for the banner)
- Pin This Pattern for Later
- Common Questions
- The Easiest (and Cutest) Way to Make a Room Feel Special
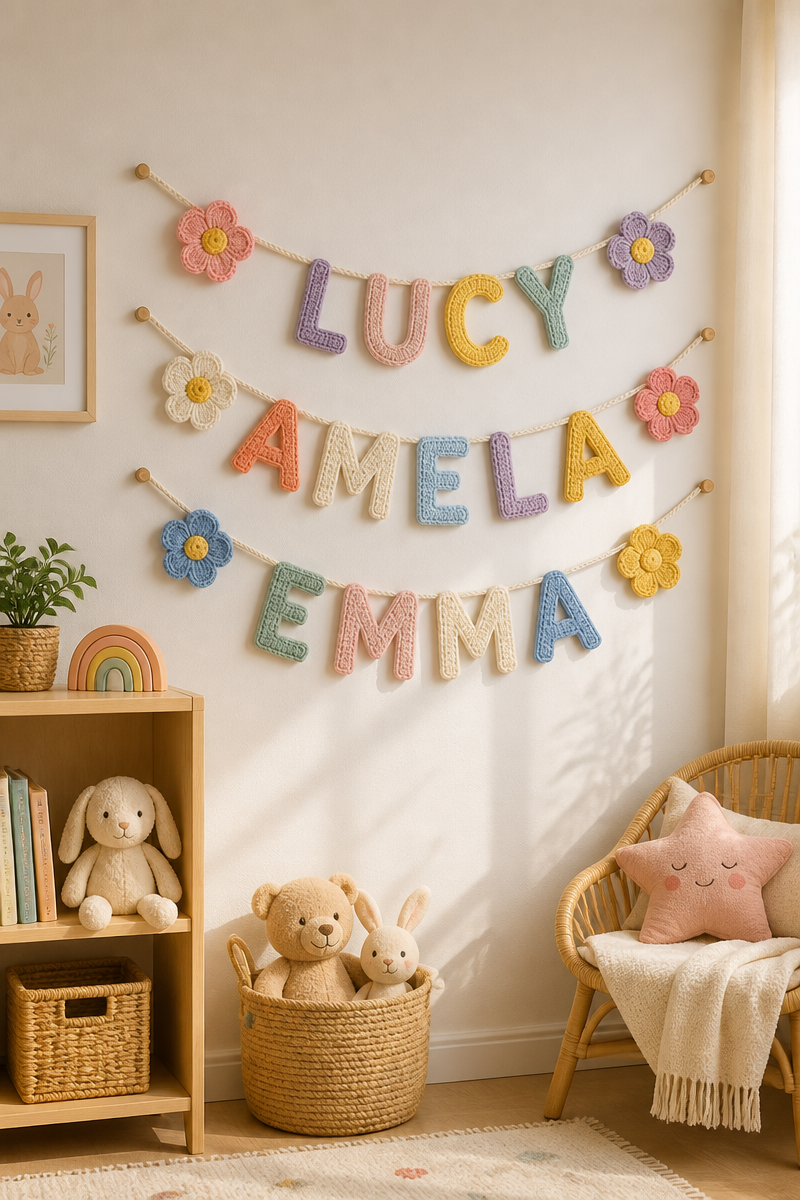
Ever tried to find a cute way to personalize a baby’s nursery—without breaking the bank? Crochet name banner decor has honestly been my solution so many times. Whether you’re decorating for your own little one or just looking for a heartfelt baby shower gift, this project’s a total winner. Quick story: I once whipped up one during naptime—just me, a yarn ball, and some really strong coffee. Instant cozy vibes, seriously.
Crochet Baby Name Banner Decor
Why a Crochet Name Banner Personalizes the Nursery
You know, nurseries kind of all start to look the same after a while, right? But a crochet name banner is different because:
- It’s unique—no two ever turn out exactly alike.
- You can match any color scheme, even that weird avocado green (hey, I like it).
- Friends and family always “ooh” and “ahh” when they see something handmade.
- It’s sort of a mini heirloom, which is way cool (and emotional).
“I got a custom crochet name banner for my daughter, and it made her whole nursery feel so special. Plus, it’s the first thing everyone mentions. Totally worth the effort!”
– Julia B., Vermont Mama
Materials Needed (worsted cotton yarn, twine, 4mm hook)
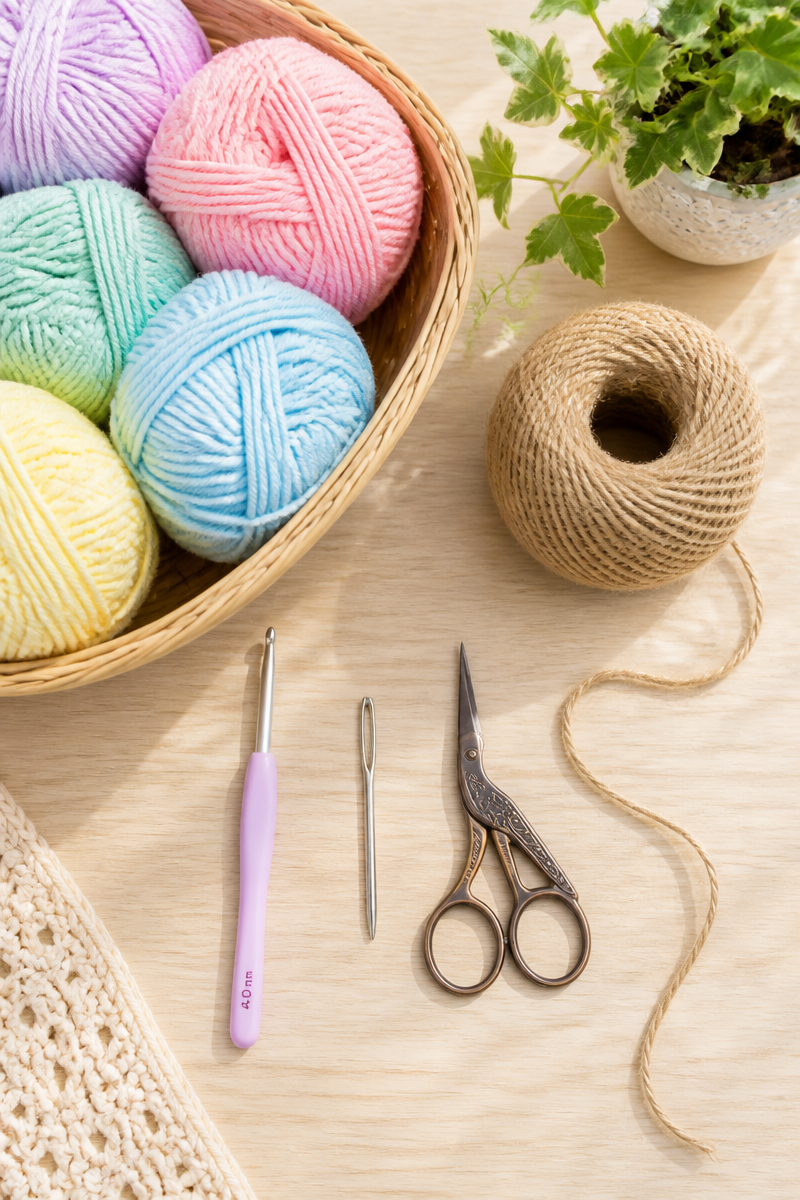
Let’s keep this easy, shall we? Here’s what you actually need:
- Worsted cotton yarn (Snuggly soft)
- Natural twine or sturdy ribbon—whatever’s on hand
- A reliable 4mm crochet hook
- Yarn needle (for weaving in those pesky ends)
- Scissors, obviously (why are mine always missing?!)
Skill Level and Time to Complete
Not gonna sugarcoat it—this is pretty friendly, even for newbies.
- If you know the basics (chain, single crochet), you’re already halfway there.
- Most banners take about a weekend, or one night if you’re really on a roll.
- It’s a nice little “Netflix and crochet” kind of project—very chill.
Step-by-Step Instructions
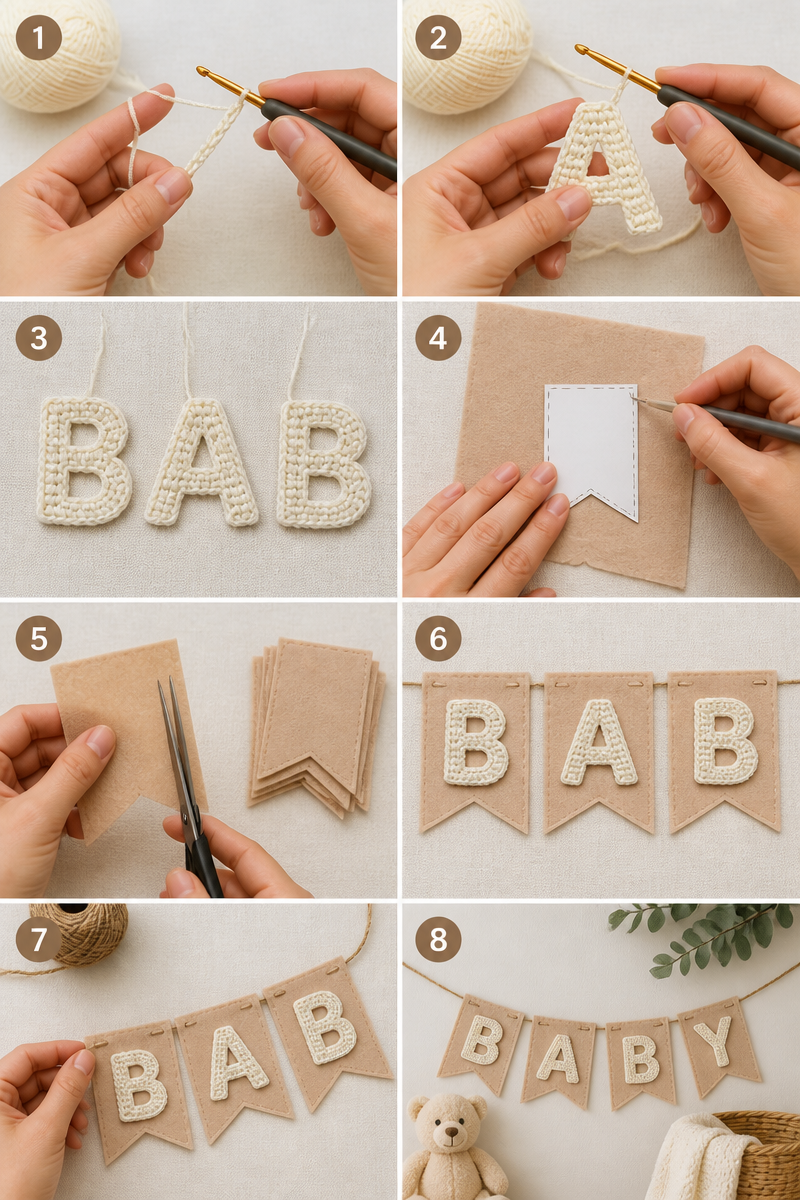
Crocheting Each Pennant Flag
Alright, flags first!
- Chain about 16 to start your triangle shape.
- Single crochet each row, decreasing at ends so it forms a point.
- Repeat for as many letters as you need. (Don’t try to get fancy, just keep it neat!)
Attaching Letters to Each Flag
This is the fun part!
- Either cut out felt letters and sew them on, or crochet super-simple block letters.
- If your handwriting’s iffy, print a template and trace. Totally allowed.
Stringing the Banner Together
Don’t overthink it here—
- Thread all those cute flags onto your twine.
- Use a yarn needle or bobby pin to make sliding them easier.
- Space them out, adjust as you like. Done and dusted. {video_youtube}
Font and Color Ideas for Nursery Themes
Let’s talk serious style choices.
- Pastels work for classic, gentle nurseries.
- Funkier brights if you’re feeling wild (I once used hot pink and teal—no regrets).
- Go with blocky letters for modern rooms. Loopy cursive for vintage vibes.
Hanging and Display Tips
I’m not saying I ruined my wall the first time I tried to hang one…but, yeah. Here’s what works:
- Use command hooks or removable washi tape (save your paint job).
- Hang above the crib or dresser—eye level is key.
- Don’t make the string too tight; a little swoop looks extra cozy.
FAQ (how to letter each flag, best length for the banner)
How do I make neat letters?
Felt is your friend or just single crochet in a distinct color. You could even try small pom poms for dots—kids love it.
What’s the best length for the banner?
Usually, add 5 inches between each flag plus a foot extra on either end. That way you don’t play “tug of war” with the string.
Can you wash crochet name banners?
Spot clean only! Cotton yarn handles a wipe-down, but toss it in the washer and…well. Don’t ask how I know.
Can beginners really do this?
Absolutely. It’s a low-stress project—mistakes just make it more personal.
Pin This Pattern for Later
Don’t want to lose track? Hit that “Save” button or screenshot like I do (my phone is full of random projects).
Handmade gifts don’t need to be complicated—or perfect, honestly.
Common Questions
Q: Do I need to crochet the letters, or can I use felt?
A: Felt is quicker—go for it. I’ve even seen folks glue wooden letters on. Zero shame.
Q: What’s the best yarn type for banners?
A: Stick with cotton. It stays crisp (no floppy flags), and it’s not fuzzy.
Q: Can you reuse a banner for siblings?
A: Sure! Swap out the flags with different names if you’re clever with how you attach each letter.
Q: How do I keep the banner from sagging?
A: Double up on twine or beef up the chain. Or, loop tight around hooks at both ends.
Q: Which letters are hardest?
A: “Q” and “Z” always make me pause. Practice on scrap yarn and don’t stress.
The Easiest (and Cutest) Way to Make a Room Feel Special
So, crochet baby name banner decor isn’t just a trend—it’s an easy, meaningful way to make a nursery feel like home. You get something unique, you save a chunk of change, and heck, you might accidentally impress the in-laws. Want more inspiration? Check out my favorite crochet project guides or the tons of helpful videos on YouTube crochet tutorials. Seriously, just try it—you’ll surprise yourself!