Easy Crochet Baby Cocoon and Hat

Affiliate disclosure: This post may contain affiliate links. I may earn a small commission at no extra cost to you. See our Privacy Policy for details HERE.
- What Is a Baby Cocoon?
- Why This Is a Great Choice for a Baby Cocoon
- Before You Start
- Yarn and Hook Recommendations
- Materials
- Easy Crochet Baby Cocoon and Hat Instructions
- Tips for Baby Cocoon Success
- Common Mistakes to Avoid
- Ways to Make It Your Own
- Care and Washing Instructions
- Frequently Asked Questions
- More Ideas to Try
- Conclusion
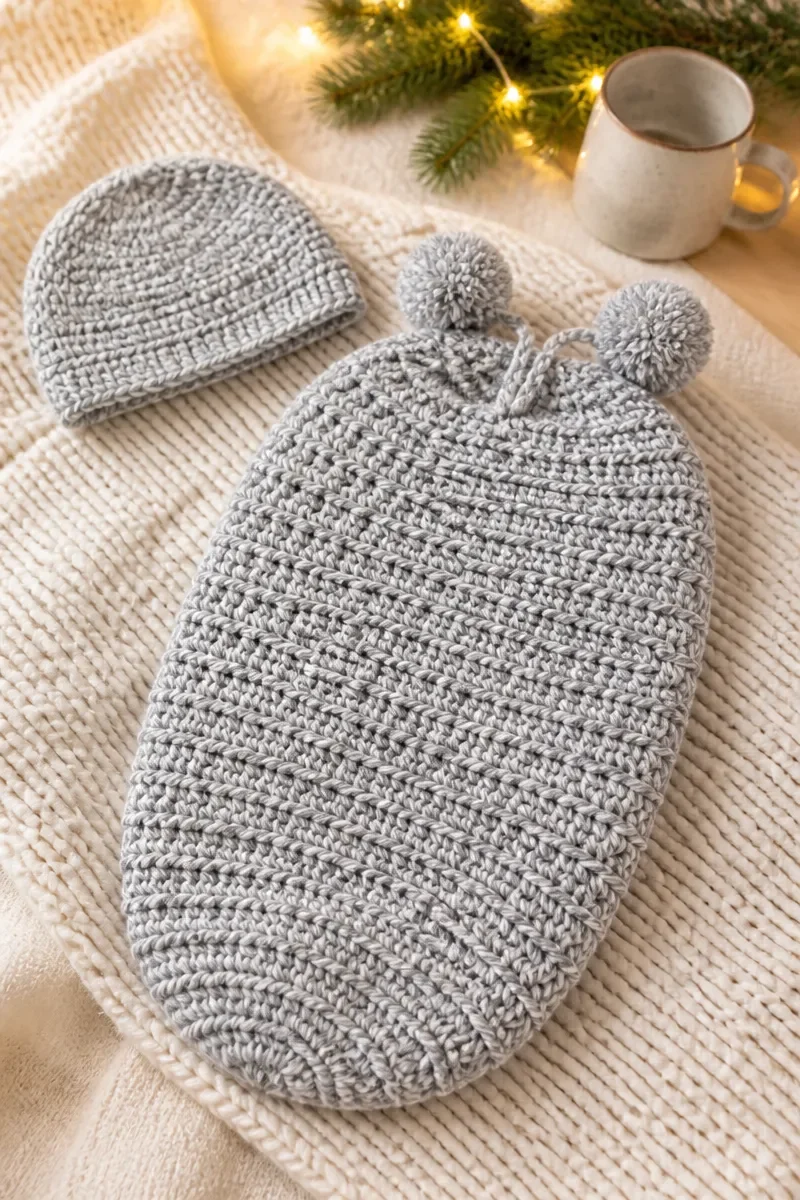
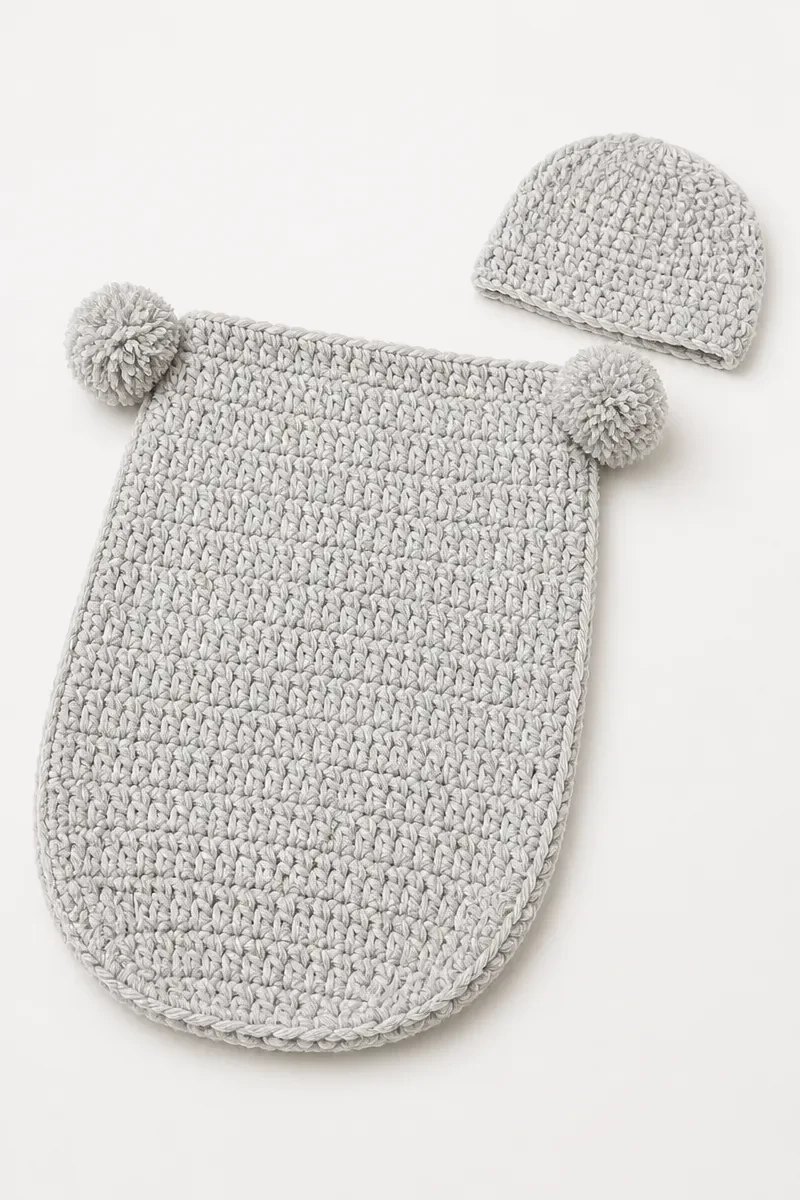
Easy Crochet Baby Cocoon and Hat is a handmade crochet set designed as a photo prop. It brings two coordinated pieces together in one approachable project, with a clear path from gathering supplies to completing the final details.
Makers who enjoy creating thoughtful keepsakes may find this project appealing, whether they are preparing a personal photo prop or a handmade gift. It can also be a pleasant choice for anyone who likes working toward a coordinated result.
Making something by hand offers time to practice patience, careful counting, and steady work. Completing a gift can also build confidence in planning, creating, and finishing a crochet project with care.
What Is a Baby Cocoon?
A baby cocoon is a crochet project made to create a soft, snug-looking prop for photographs. Its overall appearance is often cozy and coordinated, giving a picture a gentle handmade touch. The exact look depends on the yarn and the maker’s finishing choices.
This project type is generally used as a photography accessory rather than as everyday clothing. A handmade item can add a personal element to a keepsake image, while a coordinated set can help create a unified presentation. Because its intended use matters, it should be treated as a prop.
Crocheters enjoy this kind of project because it combines practical making with a sentimental purpose. It can suit makers who like creating gifts for family or friends, and the finished work can be kept as a reminder of a special occasion. As with any handmade baby-related item, safe use requires close attention to its intended purpose.
Why This Is a Great Choice for a Baby Cocoon
-
Thoughtful keepsake: A handmade photo prop can become part of a family’s personal collection. The time spent making it gives the gift a personal quality that a store-bought item may not carry.
-
Coordinated result: Making related pieces together creates a unified presentation for a photo session. This is a satisfying option for makers who like seeing separate efforts come together as a complete gift.
-
Flexible project time: The work can fit into relaxed crafting sessions at home. A maker can pause when needed and return with a clear mind, which can make careful progress more enjoyable.
-
Personal gifting: Handmade baby-themed keepsakes can mark a welcome or milestone. Choosing a thoughtful recipient and presentation can make the finished gift feel especially considerate.
-
Practice through making: A focused project offers an opportunity to strengthen general crochet habits. Paying attention to consistency and careful finishing can help makers feel more assured with future work.
Before You Start
-
Make a gauge swatch to see how your natural tension compares with the intended fabric. This helps you decide whether your hook choice produces a fabric you like before committing to the full project.
-
Read through the entire project once before beginning. A broad overview helps you understand its organization, prepare mentally for transitions, and notice where you may want to pause for a check.
-
Keep a notebook or tally sheet handy for tracking progress and recording any personal observations. Brief notes can help you resume comfortably after a break without relying on memory.
-
Organize your yarn and wind it into manageable balls before you begin. Keeping the working supply settled and easy to reach reduces tangling and lets you focus on the crochet itself.
Yarn and Hook Recommendations
-
Choose a fiber that feels pleasant in your hands and suits the intended display use. A soft, comfortable yarn can make the making process enjoyable, while care needs should suit the recipient or photographer.
-
Select a yarn weight that creates a fabric with the body you want. Heavier yarns tend to create a denser-looking fabric, while lighter yarns can produce a more delicate appearance.
-
Smooth yarn is often easier to handle when you want to see each loop clearly. Highly textured yarn can obscure details, so it may take extra attention to keep your work consistent.
-
Consider how visible the yarn’s texture and stitch definition will be in photographs. A yarn with clear surface detail can show the handmade character well, while subtle texture can give a quieter look.
-
Think about color contrast when selecting a palette. Colors with clear separation can make the fabric’s texture easier to notice, while closely related tones tend to create a blended, understated effect.
-
Let your gauge swatch guide hook selection rather than choosing by habit alone. A hook that works well with your yarn and tension can help create a fabric that feels balanced and even.
Materials
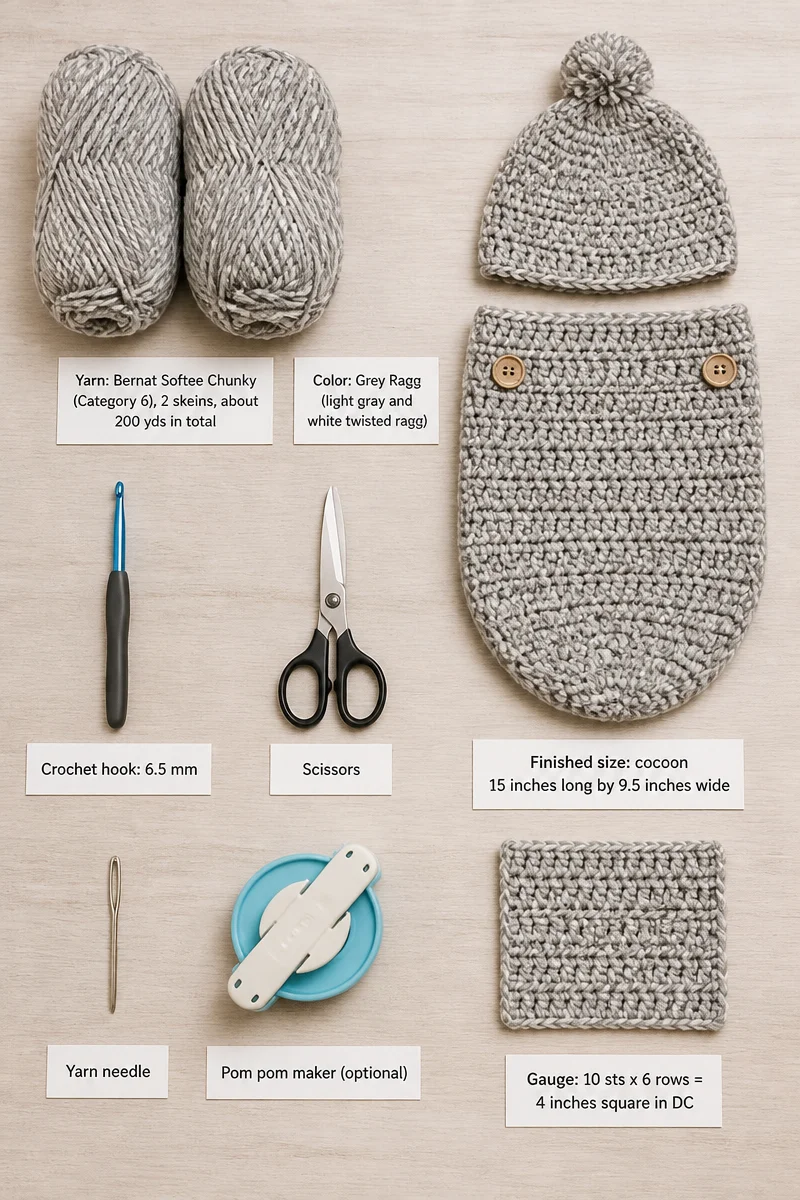
- Yarn: Bernat Softee Chunky (Category 6), 2 skeins, about 200 yds in total
- Color: Grey Ragg (light gray and white twisted ragg)
- Crochet hook: 6.5 mm
- Scissors
- Yarn needle
- Pom pom maker (optional)
- Gauge: 10 sts x 6 rows = 4 inches square in DC
- Finished size: cocoon 15 inches long by 9.5 inches wide
Easy Crochet Baby Cocoon and Hat Instructions
Color key: Grey Ragg = light gray and white twisted ragg.
Abbreviations: st(s) = stitch(es); ch = chain; SC = single crochet; SC2Tog = single crochet two together; DC = double crochet.
Notes
This set is only a photo prop. It is not meant for a baby to wear unsupervised or to sleep in. Chains at the start of a round do not count as a stitch. End each round with a slip stitch into the first stitch of that round. To change the length of the cocoon, add or remove rounds between Rounds 6 and 20.
Cocoon
-
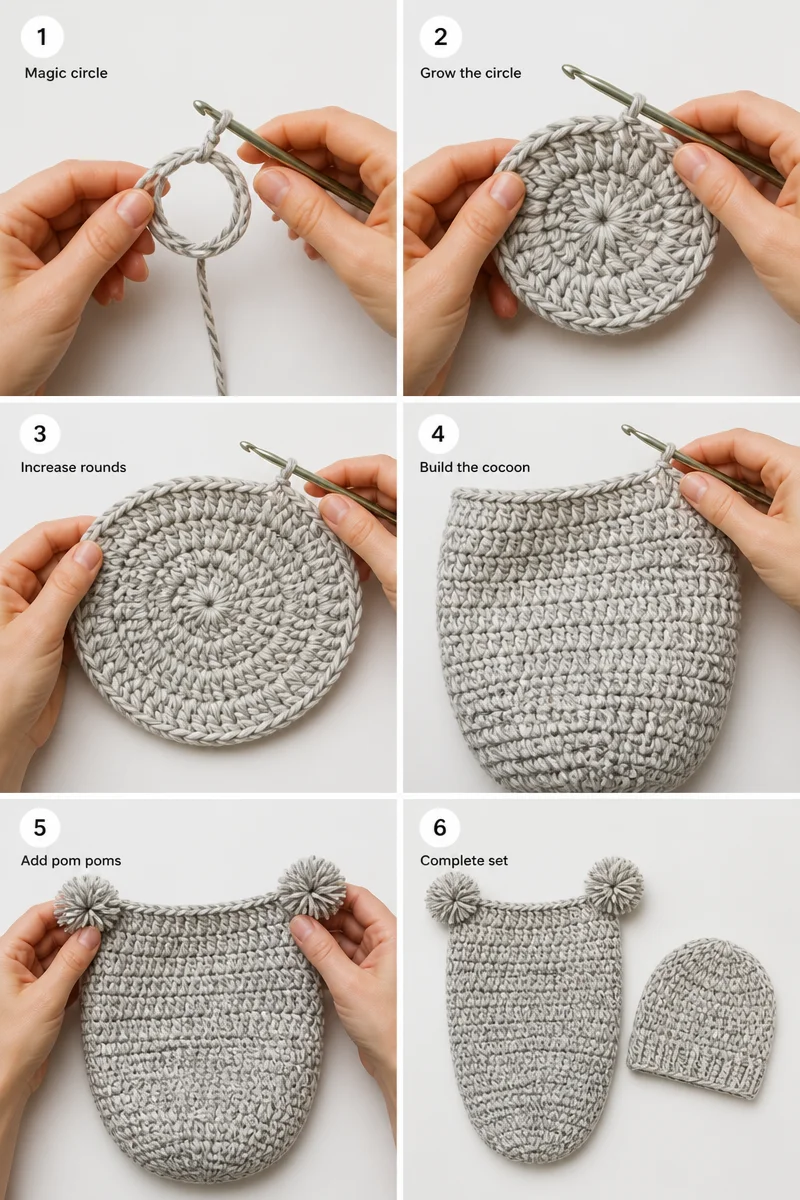
Start with a magic circle.
-
Round 1: Ch 2, work 10 DC in the magic circle. (10)
-
Round 2: Ch 2, 2 DC in each st around. (20)
-
Round 3: Ch 2, *2 DC, DC in the next st. Repeat from * around. (30)
-
Round 4: Ch 2, *2 DC, DC in the next 2 sts. Repeat from * around. (40)
-
Round 5: Ch 2, *2 DC, DC in the next 7 sts. Repeat from * around. (45)
-
Rounds 6-20: Ch 2, DC around. (45)
-
Round 21: Ch 1, *SC2Tog, SC in the next 6 sts. Repeat from * around. (40)
-
Rounds 22-23: Ch 1, SC around. (40)
-
Tie off the yarn and weave in the ends.
Cocoon pom poms
-
Cut a piece of yarn about 18 inches long and tie it around the post of a SC at the center top of the cocoon.
-
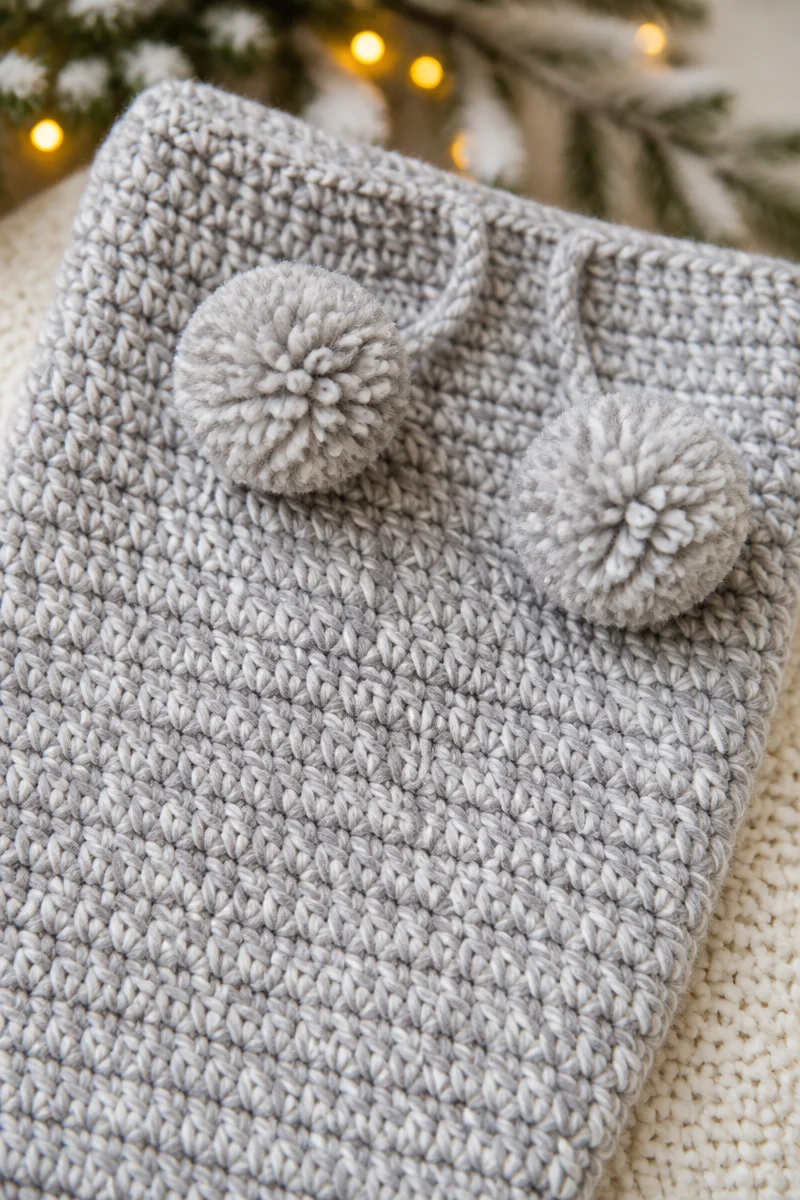
Make a small pom pom with the pom pom maker and tie it on with one end of that yarn. Do the same with the other end so there are two pom poms. Trim the extra yarn so the pom poms are even.
Hat
-
Start with a magic circle.
-
Round 1: Ch 2, work 10 DC in the magic circle. (10)
-
Round 2: Ch 2, 2 DC in each st around. (20)
-
Round 3: Ch 2, *2 DC, DC in the next st. Repeat from * around. (30)
-
Rounds 4-6: Ch 2, DC around. (30)
-
Rounds 7-8: Ch 1, SC around. (30)
-
Tie off the yarn and weave in the ends.
Tips for Baby Cocoon Success
Comfortable posture
Choose a chair that supports your back, and let your shoulders rest rather than lifting them toward your ears. A relaxed position makes it easier to guide the yarn without unnecessary strain.
Place your work where you can see it without bending your neck for long periods. Small adjustments to your seating position can help prevent stiffness during a crafting session.
Even tension
Let the yarn move smoothly through your fingers instead of gripping it tightly. A relaxed hold helps keep the fabric flexible and makes it easier to maintain a consistent feel throughout your work.
If your hands begin to feel tired, pause and release your grip. Returning with relaxed fingers is often more helpful than trying to correct tension while uncomfortable.
Track your place
Use a simple written tally to record your progress as you work. Mark each completed section immediately, so an interruption does not leave you guessing where you stopped.
A consistent way of noting progress can be especially useful when you work across several sessions. Keep your notes beside your yarn so they are easy to update.
Check your work
Take a moment now and then to look at the overall fabric, not only the loops immediately in front of you. Early attention can help you notice uneven areas while they are still manageable.
Compare the appearance of nearby sections and gently smooth the fabric in your hands. A brief visual check can reassure you that the work is developing evenly and comfortably.
Common Mistakes to Avoid
Skipping the swatch
It is tempting to begin the main work without testing how your yarn and hook interact. The resulting fabric may feel different from what you expected, even when your technique is steady.
A small gauge swatch gives you a chance to evaluate the fabric before committing more yarn. If the fabric feels too loose or too firm, adjust your hook choice and test again.
Pulling too tightly
Tight tension can happen when a maker is concentrating hard or holding the yarn with a firm grip. The loops may become difficult to work into, and the fabric can feel stiff.
Try letting the yarn glide rather than clamping it between your fingers. If your hand feels tense, put the work down for a moment and resume with a looser hold.
Miscounting stitches
It is easy to lose track when a conversation, message, or other interruption breaks your focus. A small counting error can affect the shape or consistency of the fabric.
Count regularly and use a tally sheet to record completed sections. If a count seems off, pause and inspect the work before continuing so you can find the error while it remains easy to locate.
Leaving short ends
Short yarn tails can be difficult to secure neatly, especially when the fabric is dense or the yarn has little give. They may also be more likely to work loose during handling.
Leave enough tail to weave in comfortably with your yarn needle. Take care to secure each end through several nearby loops, and avoid trimming it until it feels well anchored.
Changing supplies midway
Switching to a different yarn or hook during a project can change the fabric’s feel and appearance. Even supplies that seem similar may produce a noticeable difference in drape or thickness.
If you must replace a supply, compare it with your current work before proceeding. A small test can show whether the new combination blends well enough for a consistent result.
Ways to Make It Your Own
- Choose a different color palette to suit the recipient’s taste or the setting where photographs will be taken. A coordinated selection can give a handmade gift a distinct personal mood.
- Try another yarn of the same weight if you prefer a different fiber feel. Check its care needs and make a gauge swatch before using it.
- Make a matching second project to create a coordinated gift set. Related handmade pieces can be presented together for a thoughtful welcome or milestone present.
- Include a handwritten note describing why you chose the gift. A personal message can make a keepsake feel warm and meaningful to the recipient.
- Present the gift in a reusable fabric bag with a simple gift tag. This adds a practical touch and gives the recipient an easy way to keep the items together.
Care and Washing Instructions
Washing: Follow the yarn label for washing guidance, since care needs depend on the fiber and its construction. Use a gentle approach suited to the yarn, and avoid rough handling that could stretch or distort handmade fabric.
Drying: Support the fabric while removing excess water rather than twisting it. Lay it flat in a well-ventilated place and allow it to dry fully before storing, keeping it away from direct heat.
Storing: Keep the project clean and completely dry before putting it away. Store it in a dry, protected place, and avoid crushing it under heavy objects so its shape remains presentable.
Frequently Asked Questions
Can I use a different yarn?
Yes, another yarn can work if its weight and fiber suit the finished fabric you want. Make a gauge swatch first and compare the texture, drape, and care requirements. A change in yarn may also affect how clearly the fabric shows in photographs.
How can I keep my work even?
Relax your grip and let the yarn feed smoothly through your fingers. Try to maintain a comfortable rhythm rather than tightening each loop as you work. If the fabric begins to feel stiff, pause and ease your tension before continuing.
How can I count reliably?
Count the stitches in each section before moving on, and record your progress on a tally sheet. Place a small mark beside each completed section so interruptions are easier to manage. Consistent notes make it simpler to return to your work after a break.
What if it looks different than expected?
First, set the work down and view it from a little distance. Check whether the difference comes from tension, gauge, or the way the fabric is resting. If you are unsure, compare a swatch with the project and choose whether to continue or make an adjustment.
How long should yarn tails be?
Leave a tail long enough to thread comfortably through your yarn needle and weave through nearby loops. The amount depends on your yarn and the density of the fabric. It is better to leave a little extra than to discover the end is too short to secure neatly.
More Ideas to Try
If you enjoy making thoughtful handmade gifts, explore a baby blanket, a soft toy, a nursery basket, or a decorative pillow. These related project types offer different ways to practice planning, fabric consistency, and careful finishing. Choose an idea that suits your interests and the recipient’s needs, then enjoy creating something personal for a home or keepsake collection.
Conclusion
Give Easy Crochet Baby Cocoon and Hat a try if you would enjoy making a personal photo prop and a thoughtful handmade gift. Take your time, enjoy the creative process, and let each finished detail reflect the care you put into it. When you are ready for another project, explore more crochet ideas on the blog and find a new way to keep making.