Easy Cozy Crochet Baby Socks

Affiliate disclosure: This post may contain affiliate links. I may earn a small commission at no extra cost to you. See our Privacy Policy for details HERE.
- What Is a Baby Sock?
- Why This Is a Great Choice for Baby Socks
- Before You Start
- Yarn and Hook Recommendations
- Materials
- Easy Cozy Crochet Baby Socks Instructions
- Tips for Baby Sock Success
- Common Mistakes to Avoid
- Ways to Make It Your Own
- Care and Washing Instructions
- Frequently Asked Questions
- More Ideas to Try
- Conclusion
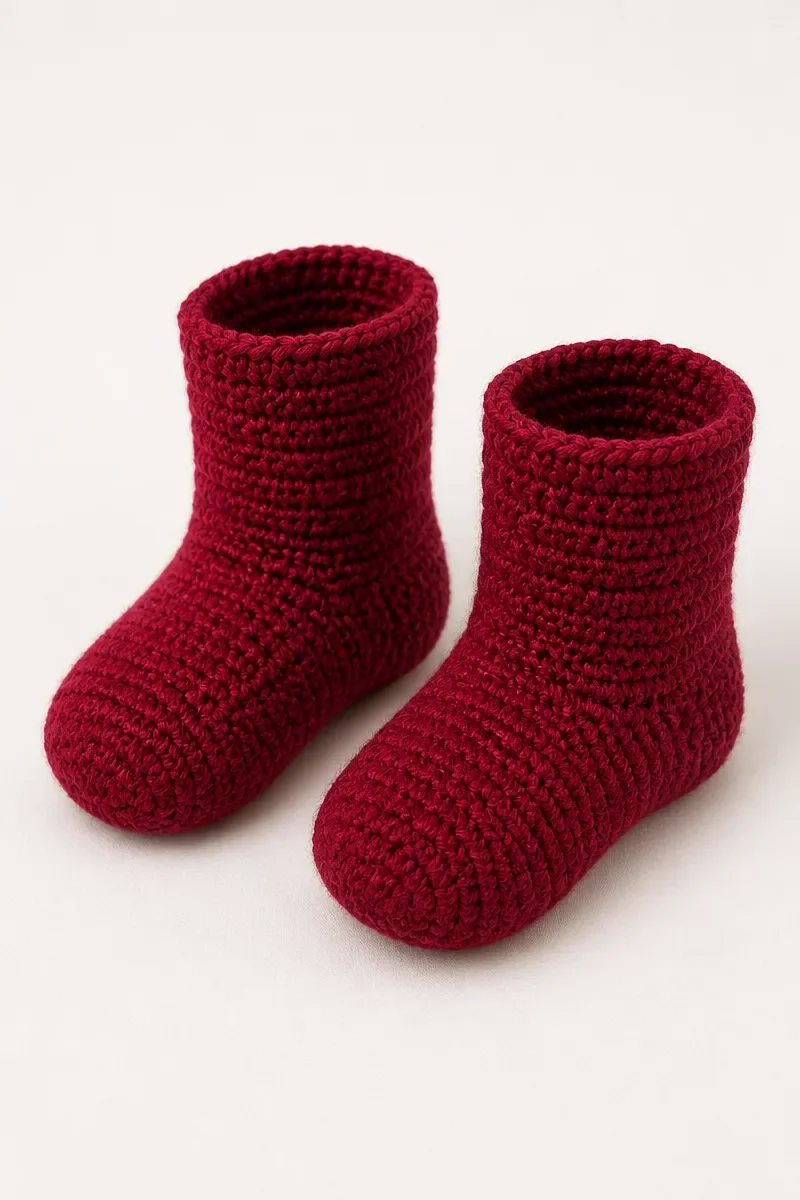
Easy Cozy Crochet Baby Socks is a crochet project for making a handmade pair of baby socks. The project offers a welcoming way to create a small, practical item with yarn and a hook.
It may appeal to makers who enjoy thoughtful handmade gifts or want to add a useful baby item to their crochet projects. A finished pair can be given to a new parent or kept for a little one in the family.
Working on a handmade project offers practice in patience and careful attention. Completing a pair can also build confidence and bring the satisfaction of making a personal gift.
What Is a Baby Sock?
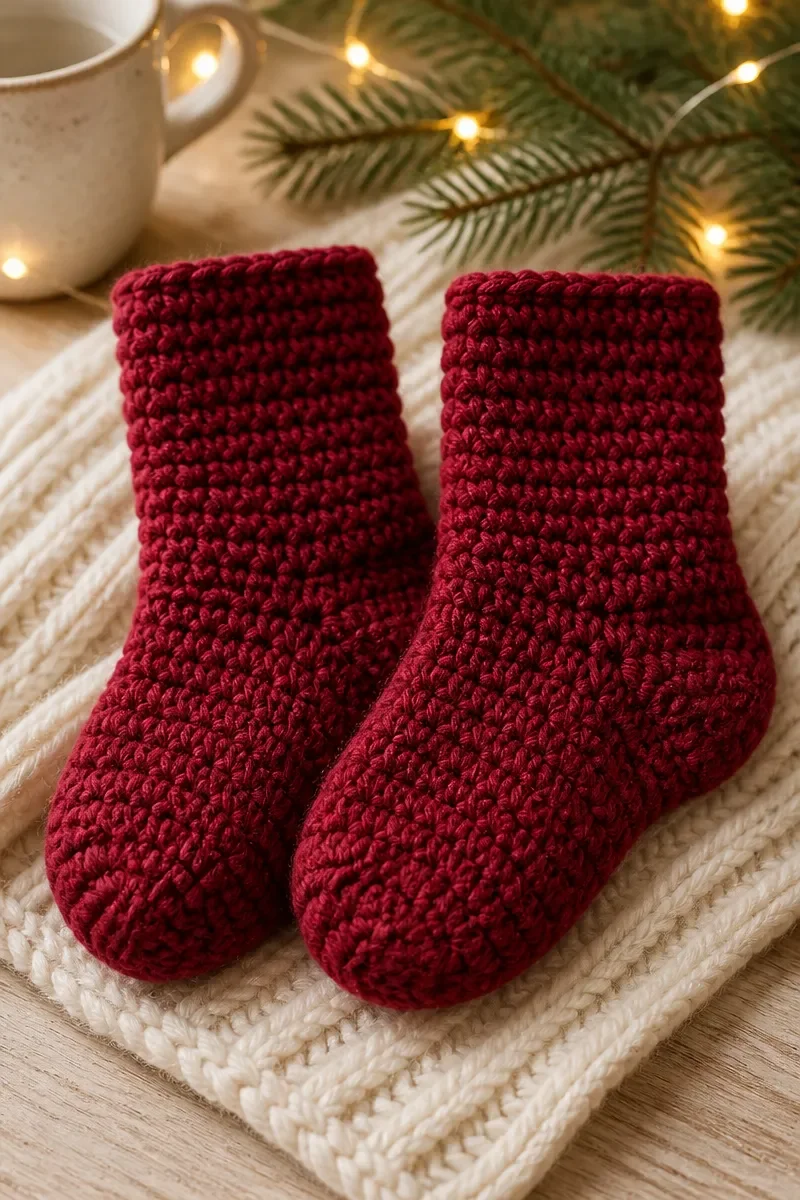
A crochet baby sock is a small handmade garment intended to cover a baby’s foot. Like other soft, crocheted wearables, it combines a comfortable fabric with a shape made to suit its purpose.
Baby socks are generally used as a gentle layer for little feet. Their usefulness makes them a popular choice for personal projects and gifts, while their small scale can make them appealing to makers who enjoy portable work.
Crocheters like making baby socks because the result is practical and personal. A pair also offers a chance to practice careful measuring and consistent work while creating something that can be treasured or used in everyday life.
Why This Is a Great Choice for Baby Socks
- Practical purpose: Baby socks are a useful handmade item for families with young children. Their everyday role makes a completed pair feel thoughtful as well as personal.
- Personal gifting: Handmade clothing can show care in a way that feels special to the recipient. A pair can be a welcome present for a baby shower or a new arrival.
- Manageable project: The small scale can suit a maker who enjoys finishing compact projects. It also offers a way to enjoy crochet without setting aside space for a large piece.
- Skill building: A wearable project encourages attention to fit, consistency, and careful measuring. These habits can support other crochet work, too.
- Keepsake potential: Handmade baby items can carry memories of the person who made them. A pair may be saved as a keepsake even after it is no longer in regular use.
Before You Start
- Make a gauge swatch with the yarn and hook you plan to use. Measuring it helps you understand your personal crochet tension before you begin the project.
- Read through everything before starting so the construction sequence feels familiar. Noticing transitions in advance can help you prepare mentally and keep your work organized.
- Keep a notebook or tally sheet handy for recording progress. A written record is useful if you pause between sessions or want to compare your two pieces.
- Wind and organize your yarn before you begin. A tidy supply is easier to handle, and keeping it in a clean place helps prevent tangles while you work.
Yarn and Hook Recommendations
- Choose a fiber that feels comfortable against delicate skin. Soft yarn can make a wearable item pleasant to handle, while care instructions should suit how the finished fabric will be maintained.
- Match yarn weight to the intended fabric and scale of the project. A consistent weight supports a more predictable fabric, especially when you are aiming for a particular fit.
- Look for smooth yarn with even thickness. It is generally easier to handle than highly textured yarn, and its strands are less likely to obscure the structure of your work.
- Select a yarn with good stitch visibility. Clear definition makes it easier to see where to place the hook and notice small inconsistencies as you crochet.
- Think about how a yarn’s surface behaves. A yarn that does not split easily can make working more comfortable, particularly when you are building confidence with a new project.
- Use the hook size that works well with your yarn and personal tension. A swatch can help you judge whether the fabric feels flexible and whether the finished measurements are on track.
Materials
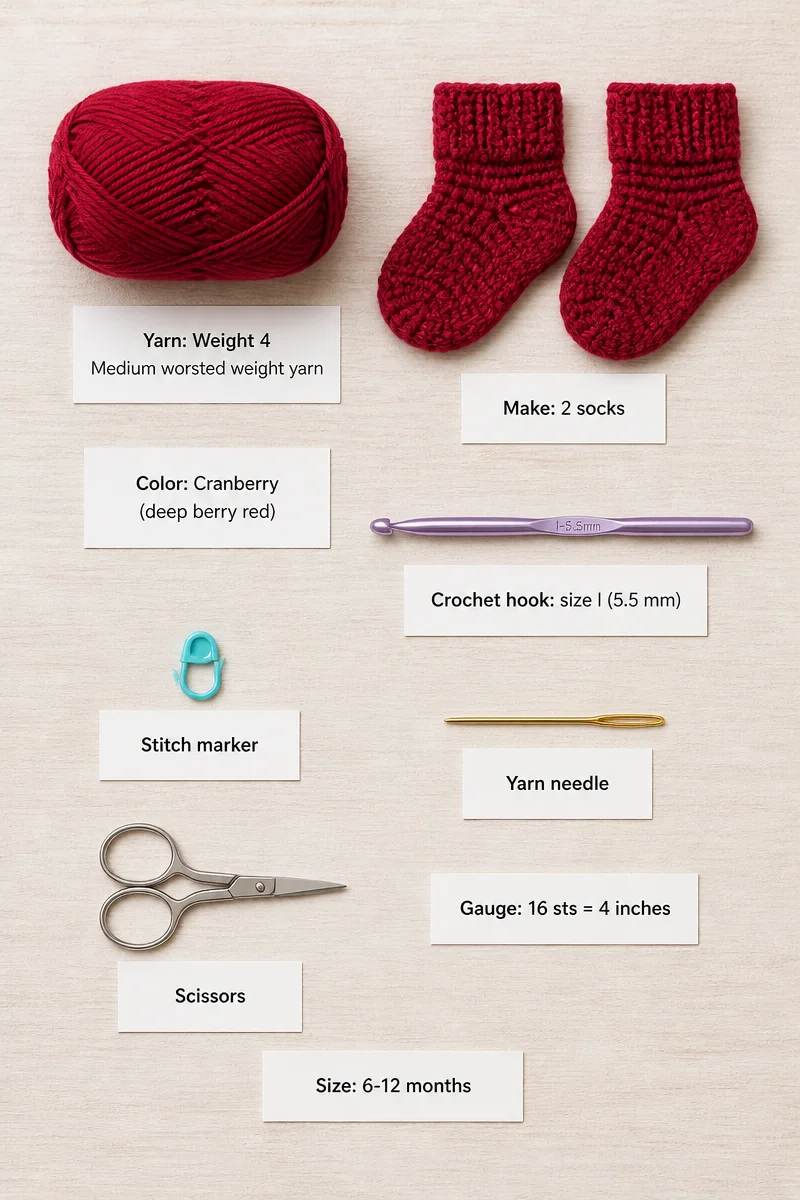
- Yarn: Weight 4 Medium worsted weight yarn
- Color: Cranberry (deep berry red)
- Crochet hook: size I (5.5 mm)
- Stitch marker
- Yarn needle
- Scissors
- Gauge: 16 sts = 4 inches
- Size: 6-12 months
- Make: 2 socks
Easy Cozy Crochet Baby Socks Instructions
Color key: Cranberry = deep berry red.
Abbreviations: ch = chain; sc = single crochet; sc2tog = single crochet 2 together; st(s) = stitch(es).
Notes: Make 2. The heel is worked back and forth in rows, then the sock continues in joined, unturned rounds.
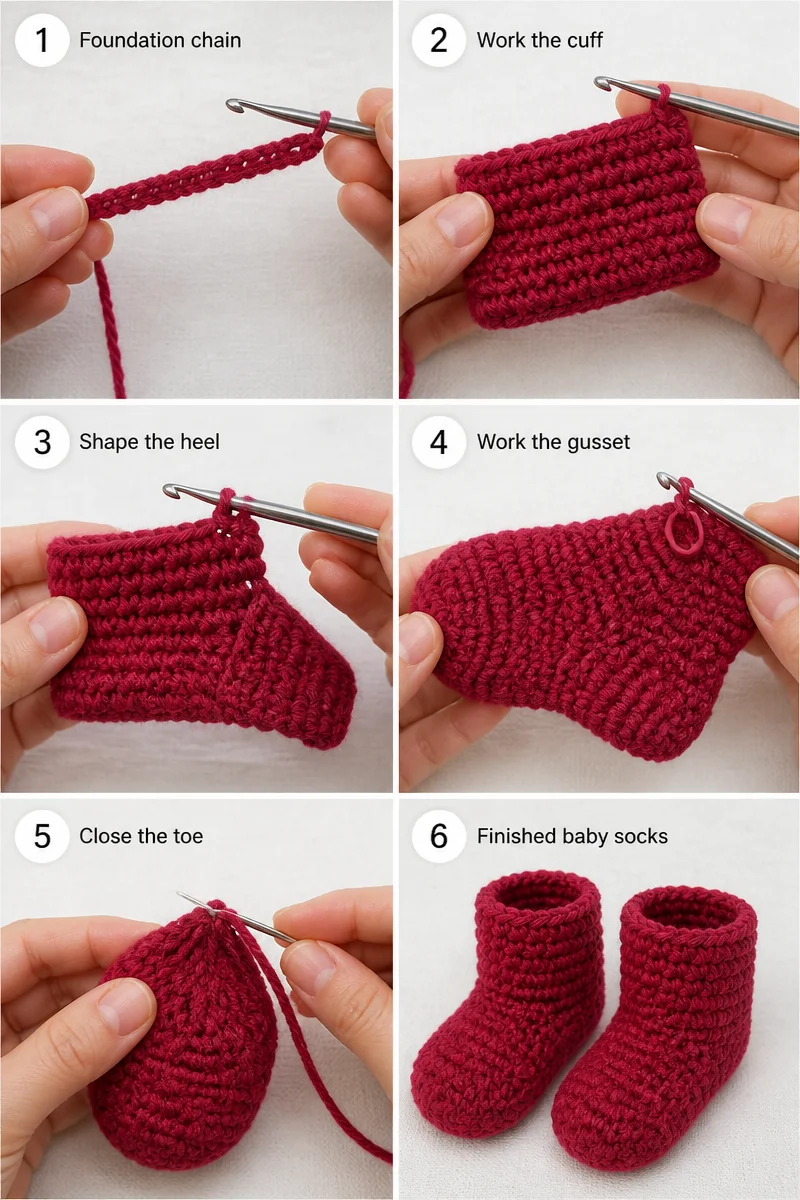
Cuff
- Ch 14.
- Row 1: Working in the back bumps of the chain, sc in the 2nd ch from the hook and in each ch across. (13 sc)
- Rows 2-15: Ch 1, turn, and sc in the back loops only of each st across.
- Fold the piece in half so Row 1 meets Row 15 with the stitches lined up.
- Row 16: Ch 1, and working in the back loops only of both layers, sc in each pair of sts across.
- Round 1 (right side): Ch 1, work 1 sc in each row end along the edge of the cuff. Do not join; work in a continuous spiral. (16 sc)
- Round 2: Sc in the next 16 sts.
Heel
Heel note
Work the heel back and forth in rows; the first row is a right side row.
- Row 1 (right side): Sc in the next 3 sts and leave the remaining sts unworked.
- Rows 2-5: Ch 1, turn, sc in the next 6 sts.
- Row 6 (wrong side): Ch 1, turn, sc in the next 5 sts.
- Row 7: Ch 1, turn, sc in the next 4 sts.
- Row 8: Ch 1, turn, sc in the next 4 sts, then sc in the next st of Row 5.
- Row 9 (right side): Ch 1, turn, sc in the next 5 sts, then sc in the next st of Row 6.
Gusset
Gusset note
Now work in rounds.
- Round 1 (right side): Do not turn. Work 4 sc evenly spaced along the edge of the heel and put a marker in the first of these 4 sts to mark the start of the round. Sc in the next 10 sts for the instep, work 4 sc evenly spaced along the other edge of the heel, then sc in the next 6 heel sts. (24 sts)
Marker tip
Move the start-of-round marker up as you finish each round.
- Round 2: Sc in the next 3 sts, sc2tog, sc in the next 8 sts, sc2tog, sc in the last 9 sts. (22 sc)
- Round 3: Sc in the next 3 sts, sc2tog, sc in the next 6 sts, sc2tog, sc in the last 9 sts. (20 sc)
- Round 4: Sc in the next 2 sts, sc2tog, sc in the next 6 sts, sc2tog, sc in the last 8 sts. (18 sc)
- Round 5: Sc in the next st, sc2tog, sc in the next 6 sts, sc2tog, sc in the last 7 sts. (16 sc)
Foot
- Round 1: Sc in each st around.
- Repeat Round 1 until the foot measures about 3 1/4 inches from the back of the heel.
Toe
- Round 1: [Sc in the next 2 sts, sc2tog] repeat around. (12 sc)
- Round 2: [Sc in the next st, sc2tog] repeat around. (8 sc)
- Round 3: [Sc2tog] repeat around. (4 sc)
- Cut the yarn, leaving a long tail. Thread the tail onto a yarn needle, weave it through the tops of the remaining sts, and pull to close the hole.
- Make a second sock the same way.
Tips for Baby Sock Success
Comfortable posture
Set up in a chair that supports your back, and let your shoulders rest rather than hunching toward your work. A relaxed position helps reduce strain during a crochet session.
Use bright, even lighting so you can see the yarn clearly without leaning close. Position the light to illuminate your hands and work while avoiding glare in your eyes.
Even tension
Let the yarn move smoothly through your fingers instead of gripping it tightly. A relaxed hold helps the loops stay consistent and keeps your hands more comfortable during longer sessions.
Check that each new loop sits naturally on the hook. If you pull hard after every movement, the fabric can become dense and difficult to work into.
Track your place
Use the stitch marker to keep track of a location that matters in the current section. Moving it as you progress can make it easier to recognize where a new pass begins.
Pause at natural stopping points and jot down your progress on a tally sheet. A brief note can help you restart without relying on memory after a break.
Check your work
Take a moment to inspect the fabric as it grows. Look for accidental gaps, missed loops, or uneven edges while the area is still easy to revisit.
Compare the two pieces periodically for similar proportions and overall appearance. Catching differences early is easier than discovering them after both have been completed.
Common Mistakes to Avoid
Skipping the swatch
A maker may skip a gauge swatch to get straight to the project, but personal tension can change how large or dense the fabric becomes. Work a sample with the selected yarn and hook, then measure it before relying on the intended fit.
A swatch can also show whether the fabric feels comfortable and flexible. If the result differs from your goal, adjust your approach before investing time in the full project.
Pulling too tightly
Tight tension can make it difficult to insert the hook and may leave the fabric stiff. This often happens when a maker grips the yarn or hook too firmly, especially while concentrating.
Let the yarn pass through your fingers with a steady, relaxed motion. If your hand begins to ache or the loops feel hard to work, pause and loosen your hold.
Miscounting
It is easy to lose track when a project has repeated sections or when conversation interrupts your focus. Skipped or extra stitches can affect the fabric’s shape and make later counting more confusing.
Count at consistent checkpoints and use the stitch marker as a visual reference when useful. If the count does not match what you expect, find the point where it changed before continuing.
Leaving ends too short
A short yarn tail can be difficult to thread through a yarn needle and secure neatly. This mistake may happen when someone cuts yarn close to the fabric without allowing enough length for weaving.
Leave a generous tail whenever the work will need a secure finish. A longer tail gives you room to weave through the fabric and helps keep the end from working loose.
Changing yarn or hook midway
Changing yarn or hook partway through can alter the fabric’s density and dimensions. Even materials that seem similar may behave differently, so the transition can create a noticeable change in texture or tension.
Prepare enough yarn from the same supply for the project before beginning, and keep the same hook in use. If a replacement is unavoidable, compare a sample first to understand how the fabric may differ.
Ways to Make It Your Own
- Choose a different color palette that suits the recipient or the season. A coordinated group of tones can give the finished gift a personal style.
- Try a different yarn of the same weight, considering softness and care needs. A smooth, comfortable fiber can make the project feel distinct without changing its general scale.
- Make a matching second project for a coordinated set. A small blanket or hat can complement the gift and give the recipient pieces with a shared look.
- Include a handwritten note with your gift. A few personal words can explain who made it and add a warm keepsake to the presentation.
- Place the finished item in a reusable gift bag with a simple tag. Thoughtful packaging makes the present feel ready to give without needing elaborate decoration.
Care and Washing Instructions
Washing: Follow the yarn label for washing guidance, since fiber content affects suitable care. Handle the item gently, avoid harsh treatment, and use a mild approach that is compatible with the yarn’s stated recommendations.
Drying: After washing, support the fabric rather than lifting it while wet, since water can make yarn heavier. Shape it gently on a clean, dry surface and let it dry fully before storing.
Storing: Keep the project in a clean, dry place away from direct sunlight and excess moisture. Store it without heavy items pressing on it, and check periodically that the storage area remains fresh.
Frequently Asked Questions
Can I use a different yarn?
Yes, a different yarn can work if its weight and feel suit the intended fabric. Check its care needs before choosing it. A small swatch helps you judge whether the yarn behaves comfortably with your hook.
How can I keep my work even?
Relax your grip and allow the yarn to feed smoothly through your fingers. Try to make each loop similar in size. Taking short pauses can help your hands stay comfortable and your attention remain steady.
How do I count reliably?
Count at planned checkpoints instead of waiting until a long section is complete. A stitch marker can help you identify a useful reference point. Writing down your progress also makes it easier to resume after an interruption.
What if it looks different than expected?
Pause and inspect the fabric under good lighting before deciding what to change. Compare its proportions and texture with your intended result. If something seems off, identify where the difference began and correct it before continuing.
How long should yarn tails be?
Leave enough tail to thread comfortably through a yarn needle and weave securely into the fabric. The needed length depends on the finishing area. A little extra is easier to manage than an end that is too short.
More Ideas to Try
If you enjoy making small handmade gifts, explore a baby hat, a soft blanket, a simple cardigan, or a nursery toy. Each offers a different way to practice working with yarn while creating something personal. You can choose a project to match your available time, the recipient’s needs, or the kind of crochet experience you would like to build next.
Conclusion
Give Easy Cozy Crochet Baby Socks a try if you would enjoy making a personal handmade gift. Take your time, enjoy the process, and let each completed project build your confidence. Explore more crochet ideas on the blog whenever you are ready to choose another project.